In this post, you will learn how to create a simple OData service using the RAP model. In this example, a single table is used to create a service.
If you are new to RAP, check out earlier post from this series – Introduction to RAP.
We will create below application without having to write a single line of code on frontend i.e. UI5/Fiori.

1. Create a Table
Right click on the package and chose New > Other ABAP Repository Object
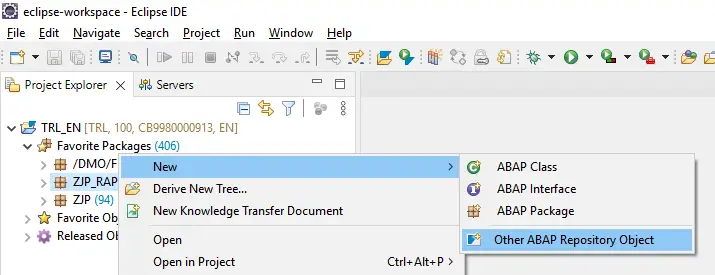
Chose Database Table, click Next

Enter Name and Description. Click Next.

Select a TR and Click Finish. If you do not have existing TR, create a new request.

Add the table fields after client field.

Completed the table as below.
@EndUserText.label : 'Travel Booking Table'
@AbapCatalog.enhancement.category : #NOT_EXTENSIBLE
@AbapCatalog.tableCategory : #TRANSPARENT
@AbapCatalog.deliveryClass : #A
@AbapCatalog.dataMaintenance : #RESTRICTED
define table zjp_rap_book {
  key client            : abap.clnt not null;
  key travel_id         : /dmo/travel_id not null;
  key booking_id        : /dmo/booking_id;
  booking_date          : /dmo/booking_date;
  customer_id           : /dmo/customer_id;
  carrier_id            : /dmo/carrier_id;
  connection_id         : /dmo/connection_id;
  flight_date           : /dmo/flight_date;
  @Semantics.amount.currencyCode : 'zjp_rap_book.currency_code'
  flight_price          : /dmo/flight_price;
  currency_code         : /dmo/currency_code;
}
Activate the table.
At this point the table will not contain any data. So let us create a data provider class with below code.
CLASS zjp_book_data DEFINITION
  PUBLIC
  FINAL
  CREATE PUBLIC .

  PUBLIC SECTION.
    INTERFACES if_oo_adt_classrun.
ENDCLASS.

CLASS zjp_book_data IMPLEMENTATION.
  METHOD if_oo_adt_classrun~main.
    DELETE FROM zjp_rap_book.
    INSERT zjp_rap_book FROM (
        SELECT FROM /dmo/booking
        FIELDS
            travel_id         AS travel_id,
            booking_id        AS booking_id,
            booking_date      AS booking_date,
            customer_id       AS customer_id,
            carrier_id        AS carrier_id,
            connection_id     AS connection_id,
            flight_date       AS flight_date,
            flight_price      AS flight_price,
            currency_code     AS currency_code
         ORDER BY booking_id
         UP TO 10 ROWS ).

    COMMIT WORK.
    out->write( 'Booking data inserted'  ).
  ENDMETHOD.
ENDCLASS.
Execute the class to add the data.

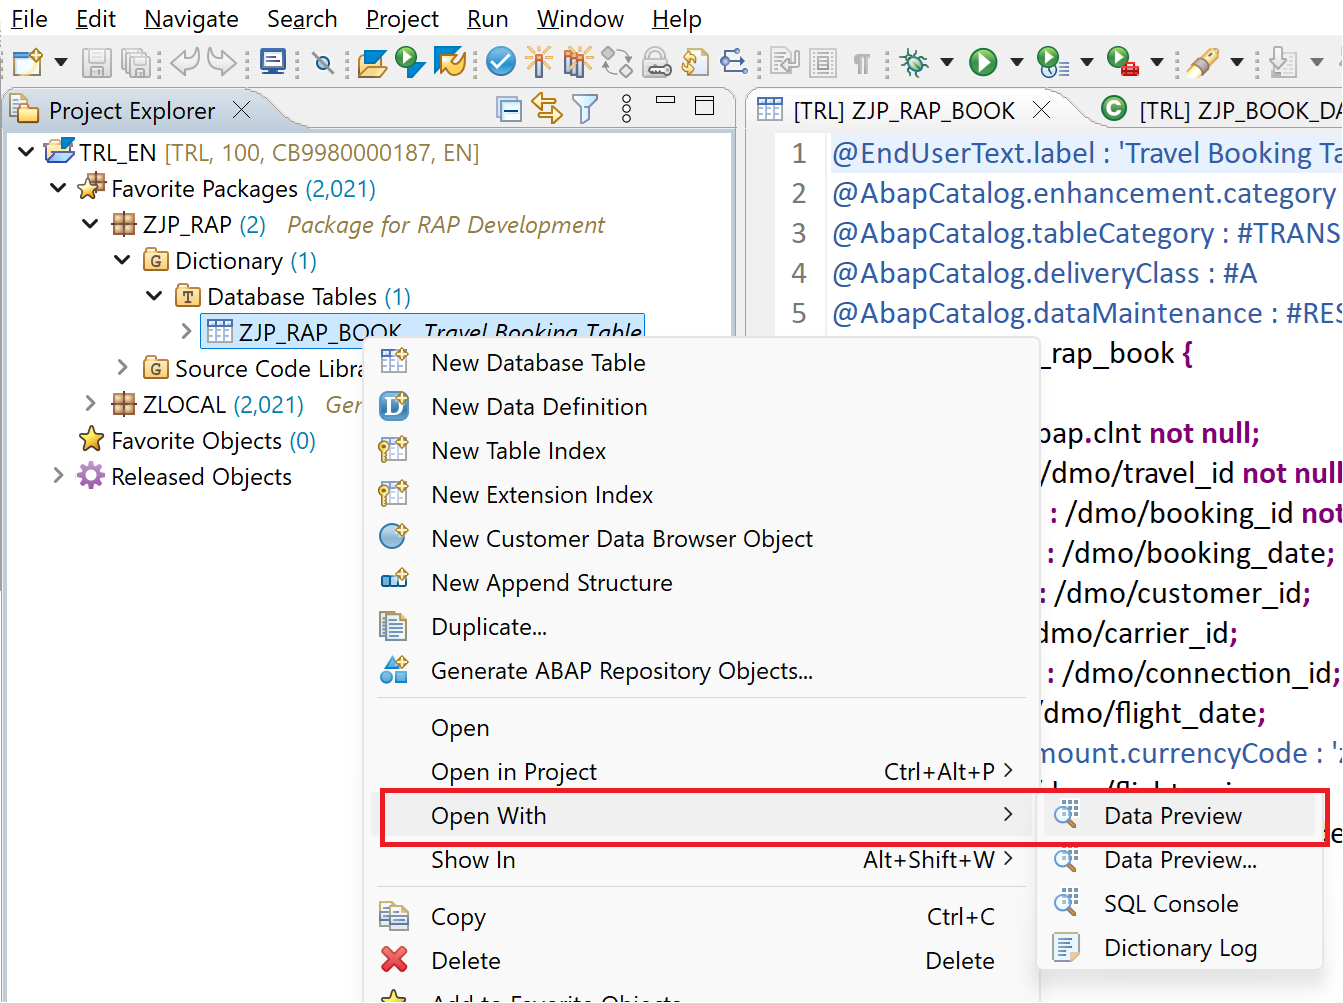
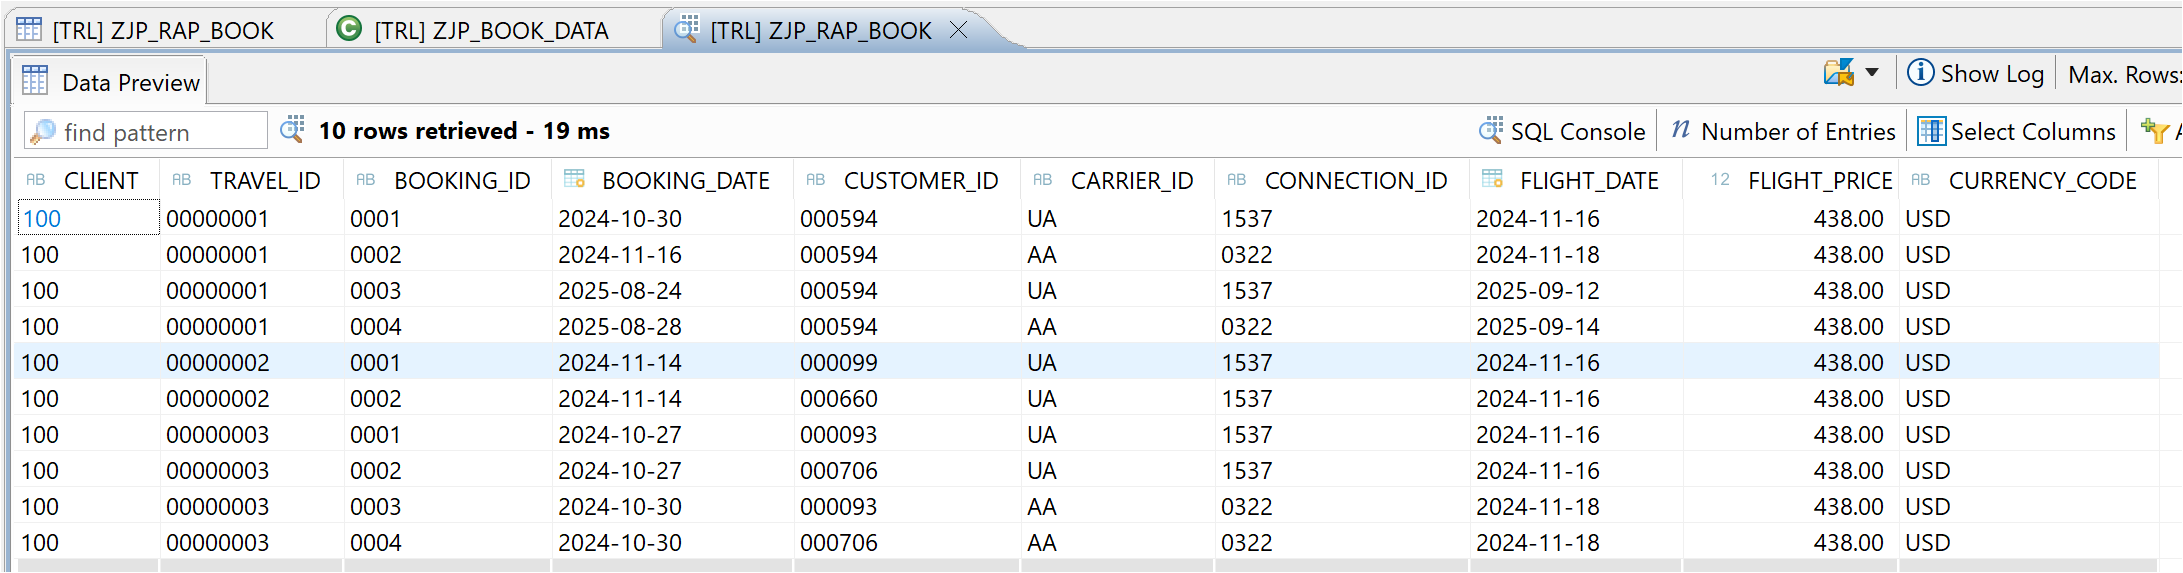
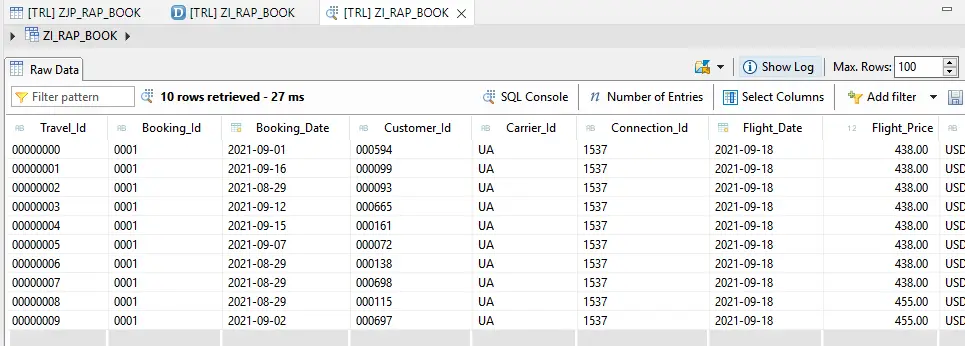
The data is added to the table. The table data can be viewed by using Data Preview as shown below.
2. Create Root CDS Entity
CDS Entity is create to expose the data through OData / Web API.
Right click on the package and chose New > Other ABAP Repository Object
Chose Data Definition. Click Next.

Enter Name and Description. Click Next.

Select TR. Click Next.

Chose template ‘Define Root View Entity‘. Click Finish.

Note that here you are creating a CDS Entity instead of a CDS view. As seen below, the Entity usually has compositions and associations, but for this post, we are not going to use any of those to keep things simple.
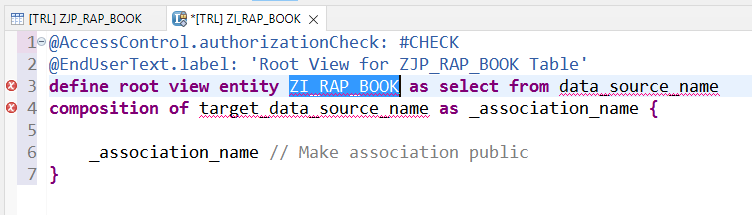
Complete the CDS Entity as below. You will see a warning as we have not created Authorizations for this entity, which can be ignored at the moment.
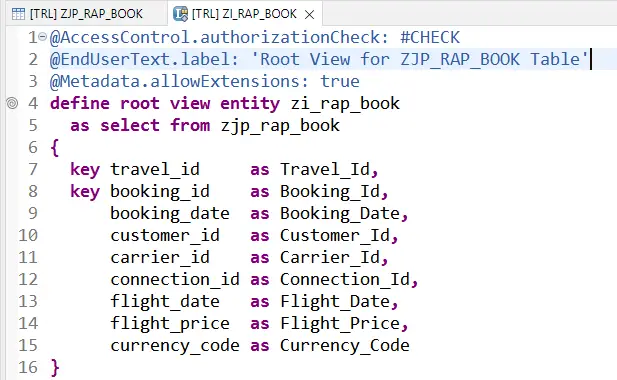
@AccessControl.authorizationCheck: #CHECK
@EndUserText.label: 'Root View for ZJP_RAP_BOOK Table'
@Metadata.allowExtensions: true
define root view entity zi_rap_book
  as select from zjp_rap_book
{
  key travel_id     as Travel_Id,
  key booking_id    as Booking_Id,
      booking_date  as Booking_Date,
      customer_id   as Customer_Id,
      carrier_id    as Carrier_Id,
      connection_id as Connection_Id,
      flight_date   as Flight_Date,
      flight_price  as Flight_Price,
      currency_code as Currency_Code
}
Activate. Execute as ABAP Application and check the data.
3. Create a Metadata Extension
Metadata extension is created to annotate the CDS Entity and fields. We add description, screen position details etc., through these annotations.
Locate your CDS entity in the Package under node Core Data Services > Data Definitions. Right click on the Entity and Chose New Metadata Extension

Enter Name, and Description and chose Next.

Chose a TR and click Finish

You will get below template.

Complete the Metadata Extension as below.

The screenshot does not cover complete code, so use below code.
@Metadata.layer: #CORE
@UI: {
  headerInfo: { typeName: 'Booking',
                typeNamePlural: 'Bookings',
                title: { type: #STANDARD, label: 'Travel', value: 'Booking_ID' } }
              }
annotate view zi_rap_book
    with
{
  @UI.facet: [ { id:              'Travel',
                 purpose:         #STANDARD,
                 type:            #IDENTIFICATION_REFERENCE,
                 label:           'Booking',
                 position:        10 } ]
 @UI: {  lineItem:       [ { position: 10 } ],
         identification: [ { position: 10 } ],
         selectionField: [ { position: 10 } ] }
 travel_id;
 @UI: {  lineItem:       [ { position: 20 } ],
         identification: [ { position: 20 } ],
         selectionField: [ { position: 20 } ] }
 booking_id;
 @UI: {  lineItem:       [ { position: 30 } ] ,
         identification: [ { position: 30 } ]}
 booking_date;
 @UI: {  lineItem:       [ { position: 40 } ] ,
         identification: [ { position: 40 } ]}
 customer_id;
 @UI: {  lineItem:       [ { position: 50 } ] ,
         identification: [ { position: 50 } ]}
 carrier_id;
 @UI: {  lineItem:       [ { position: 60 } ] ,
         identification: [ { position: 60 } ]}
 connection_id;
 @UI: {  lineItem:       [ { position: 70 } ] ,
         identification: [ { position: 70 } ]}
 flight_date;
 @UI: {  lineItem:       [ { position: 80 } ] ,
         identification: [ { position: 80 } ]}
 flight_price;
 @UI: {  lineItem:       [ { position: 90 } ] ,
         identification: [ { position: 90 } ]}
 currency_code;

}
Activate.
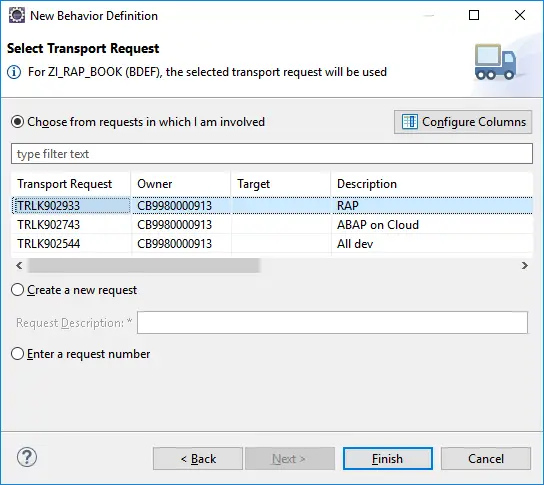
4. Create a Behavior Definition
Behavior Definition is created to specify operation details that are possible for the Entity. This refers to CRUD operations. By default READ / QUERY operations are enabled.
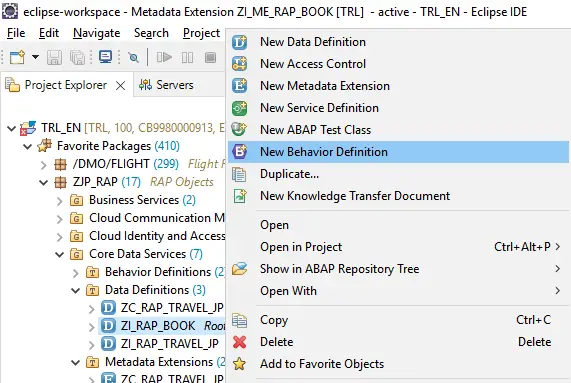
Right click on CDS Entity and chose New Behavior Definition.
All details will be populated. Default implementation type is managed. We do not need to change it for this example. Click Next.
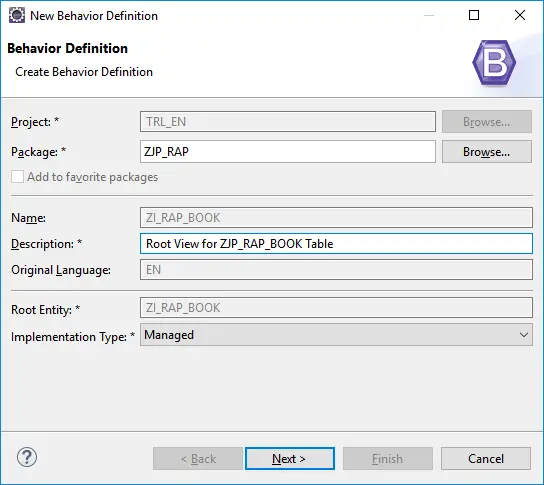
Chose a TR and click Finish.
Definition is created as below.

At this point, we do not need a class, so edit the definition as below. Note that you need to have same field names as table in CDS Entity. If the names are changed using AS, creating a class becomes mandatory.

managed;

define behavior for zi_rap_book
persistent table ZJP_RAP_BOOK
lock master
{
  create;
  update;
  delete;
}
Activate.
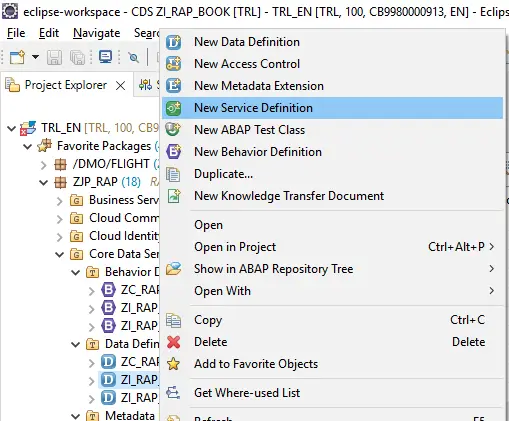
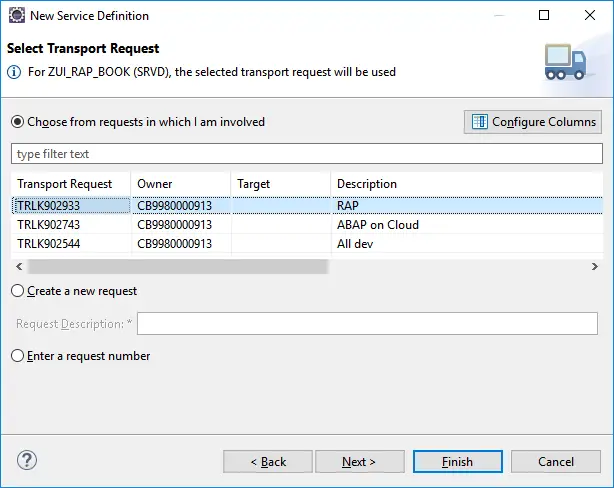
5. Create a Service Definition
Service definition defines which CDS entities are exposed as part of the service.
Right click on the Root Entity and Chose New Service Definition.
Enter Name and Description. Click Next.

Chose TR and click Finish.
Service Definition is created. Just activate.

@EndUserText.label: 'Service Definition for Booking CDS view'
define service ZUI_RAP_BOOK {
expose zi_rap_book;
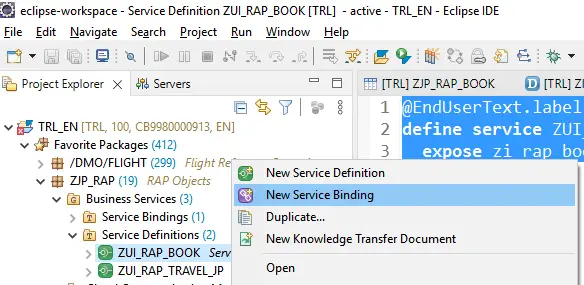
}6. Create Service Binding
Service binding is created to Publish the service. Here, we chose the protocol like OData V2.
Right click on service definition and select New Service Binding.
Enter Name, Description and chose Binding Type as OData V2 – UI.

Chose TR and click Finish.

Service Binding is created. First activate the service binding.
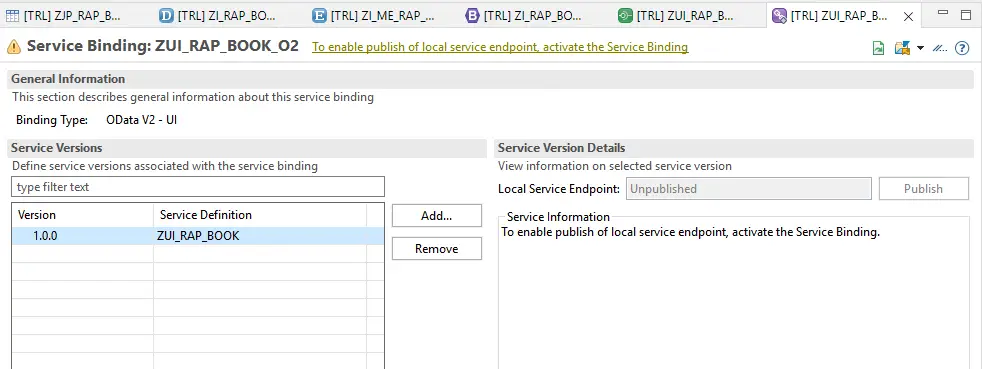
Once activated, Publish button is enabled. Click to Publish the service.

This will take few minutes. The service will be published.
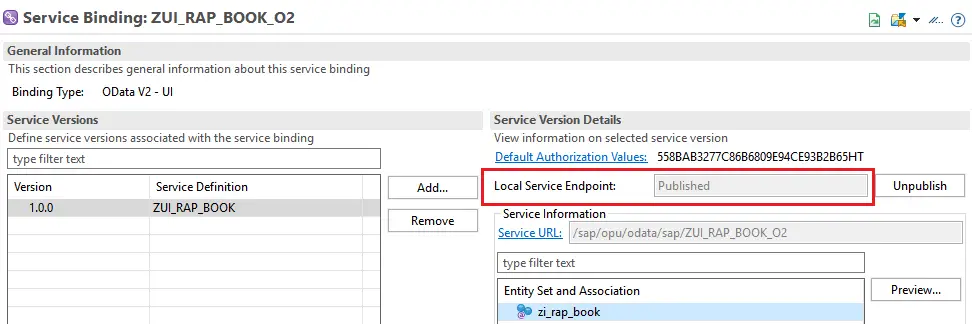
The service can be tested / previewed. Select the entity zi_rap_book and click on Preview.
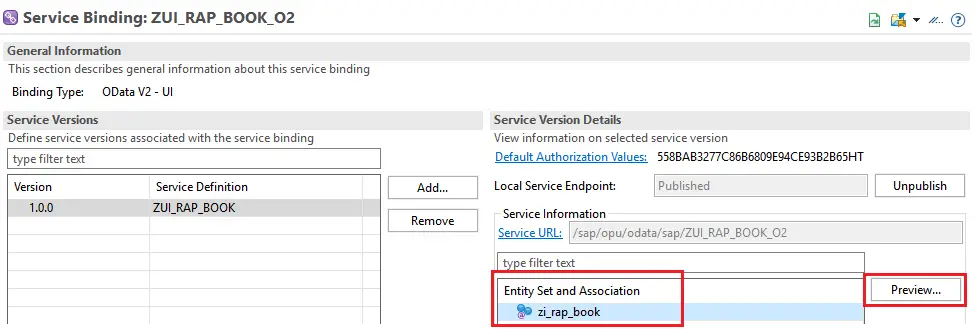
Preview page appears similar to a Fiori Element Application.
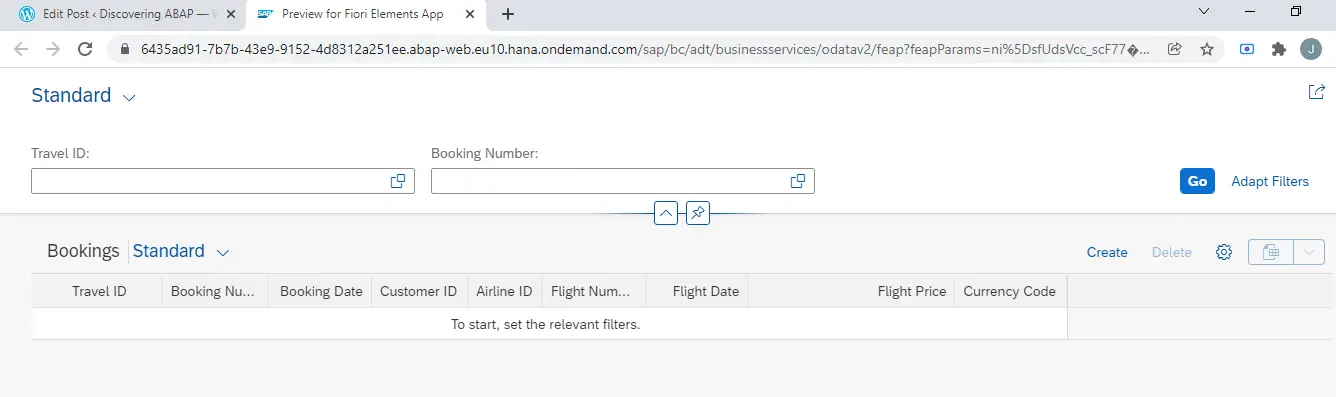
Click Go to see the data.
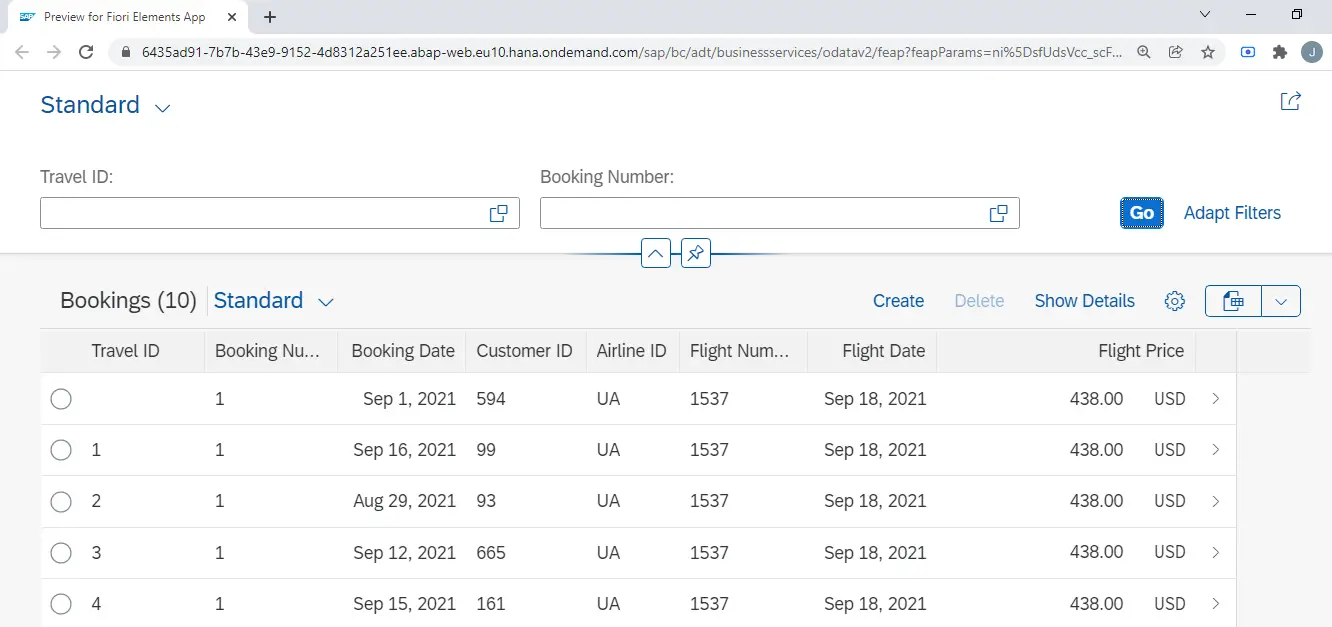
This application preview can also be used to perform CRUD i.e. Create, Read, Update and Delete Operations.
CREATE
Click Create to go to new entry screen.

READ
Click on any entry to display it.
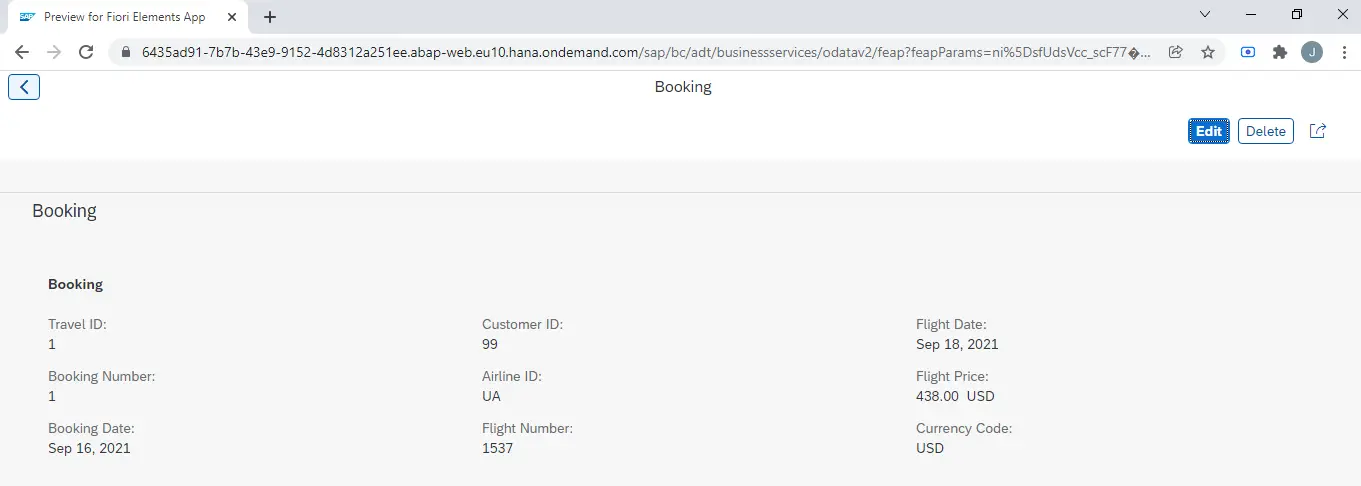
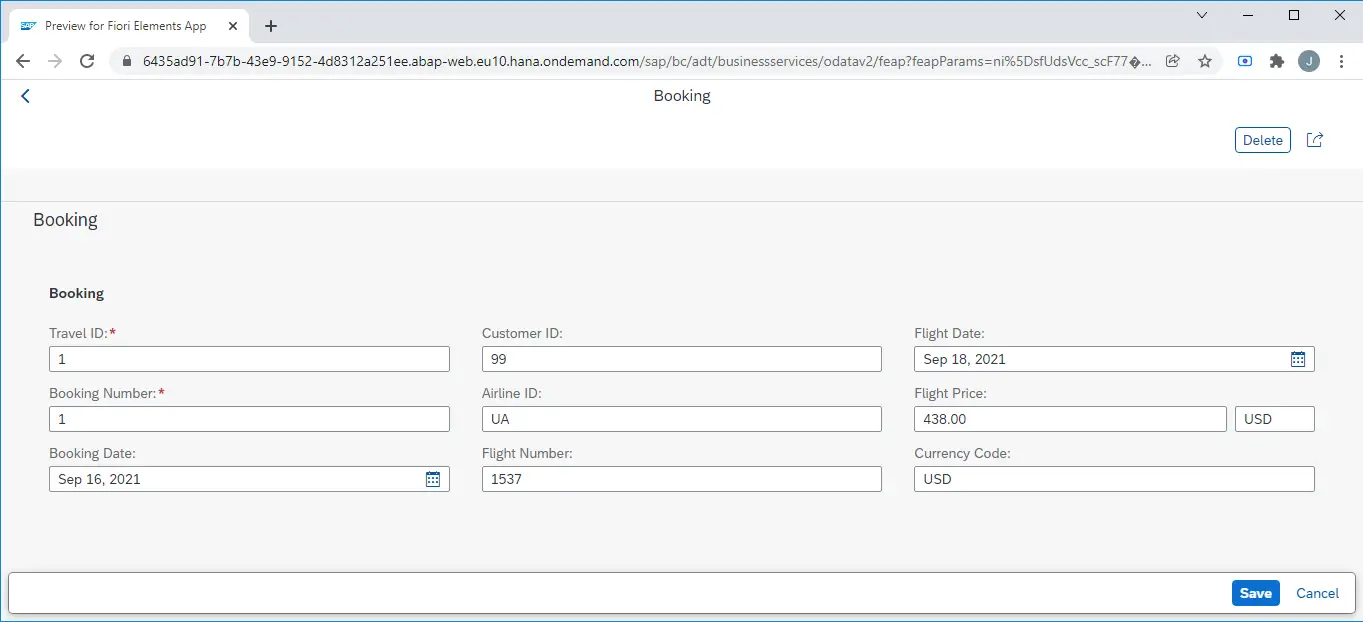
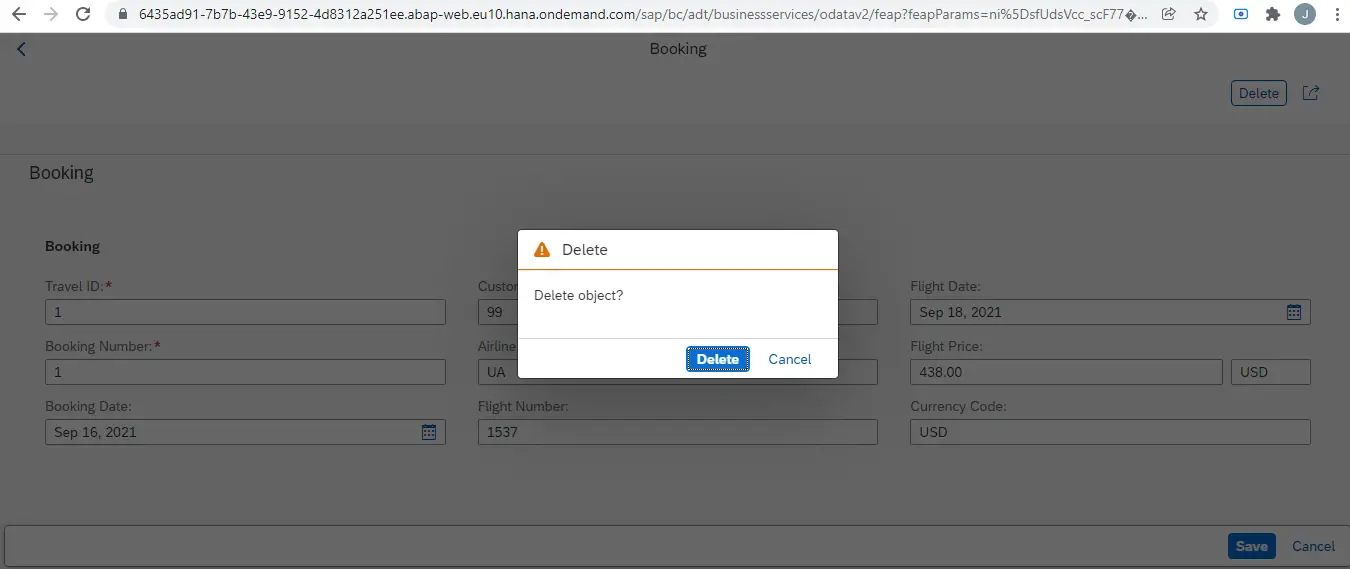
UPDATE / DELETE
These options appear on the display screen in the top right corner.
Edit will open the record in edit mode where changes can be made and saved.
Delete will simply delete the record and return to main screen.

Pretty easy right? Give it a try and let me know in the comments section whether this post was helpful.
For this example, I used a single table, but usually a root view will contain associations and composition in actual applications. We will see how to implement those scenarios in subsequent posts.
Visit ABAP RESTful Application Programming Model to explore all articles on ABAP RAP Model.
If you like the content, please subscribe…

Hi Jagadish,
Thanks for the post on RAP Model.. I tried excatly the same way as u suggested. But getting some short dump when doing preview at last step. FIORI Screen is displayed.. When i hit Go..no records are displayed .
error details
Header Information
Short Text The current application has intentionally triggered a termination with a short dump.
Runtime Error RAISE_SHORTDUMP
Exception CX_SADL_DUMP_APPL_MODEL_ERROR
Development Object STOB ZMTRAVEL_ROOTENTITY
Date/Time 12/25/2021 16:14:33 (System)
User CB9980001869 (fcbc0c39-96c9-462f-8b40-c5d24105b47d)
Client 100
Host 0xa0b1e9d_TRL_00
What happened?
The current application program has recognised an error that it could
not handle adequately. To reverse any database changes made and to save
information for further analysis, the application program has
intentionally triggered a short dump using the language elements RAISE
SHORTDUMP or THROW SHORTDUMP.
???APDOCU ABAPRAISE_SHORTDUMP
LikeLike
Hi Mahesh
You tried this in BTP could abap system?
Also, can you send screenshots of your root view and other artifacts for me to check?
Send those on email jp.sap.abap21@gmail.com
LikeLike
Thanks Jagdish. it worked.
I have deleted and activated the service definition again..
LikeLike
That is good news. Nothing feels better than your UI5 apps working well
LikeLike
Can you Please post your solution ? I am also facing the same error .
LikeLike
Hi Mahesh,
Can you please post your solution , getting same dump ?
LikeLike
If i try to Preview after publishing the service, it takes me to PDF app and says cannot open. It does not open the Fiori app as shown in the above slides. Am i missing something here? Could you please guide on this?
LikeLike
Hi Srinivasa
You need to select the node and click on Preview.
Share screenshots in case you continue to get the error. Send email to jp.sap.abap21@gmail.com
LikeLike
Hi Jagdish,
Please help me to get good and IDES server for practice
LikeLike
Hi Ganesh
Please send an email on jp.sap.abap21@gmail.com. I will provide you the contact details.
LikeLike
Hi Jagdish,
Thank you for sharing this..
I tried this blog.. everything went well.. except create screen in application..
creation recrds screen is displaying as blank but bottom create and cancel button are displayed. Please let me know what was missing.
Thank you.
LikeLike
Can you please validate the Metadata extension part? That drives the display on the object page.
LikeLike
I got Issue. Can you share solution?
LikeLike
For anyone struggling with the preview part, comment out the authorization line in behaviour definition and redo the steps after that.
Thanks
LikeLike