In earlier posts I covered,
- RESTful Application Programming model – Introduction to RAP
- Working Example of RAP – Created OData Service using RAP
- SAP Business Application Studio – Dev Space To Build UI5/Fiori Apps
In this post, you will learn how to use the Business Application Studio to create Fiori Element Application with the OData Service created using the RAP model.

1. Log into SAP BTP and Launch Business Application Studio.
Refer SAP Business Application Studio – Dev Space To Build UI5/Fiori Apps if you do not know how to do this.

2. Create Project from Template
2.1 Click on Start from template
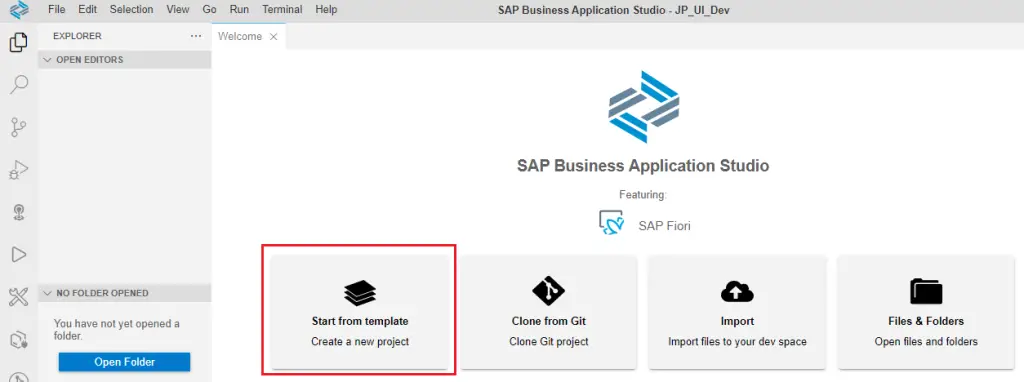
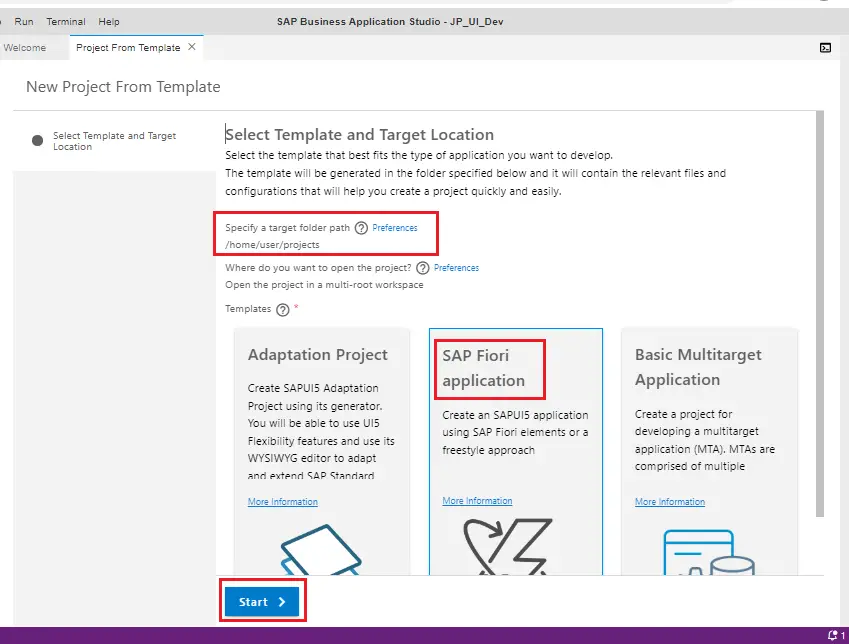
2.2 Select Template and Target Location
Keep the default path and select SAP Fiori application. Click Start.
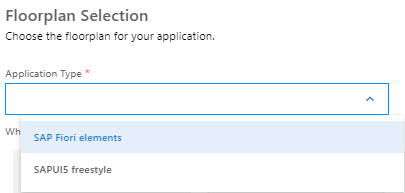
2.3 Floorplan Selection
In the application type, select SAP Fiori elements.
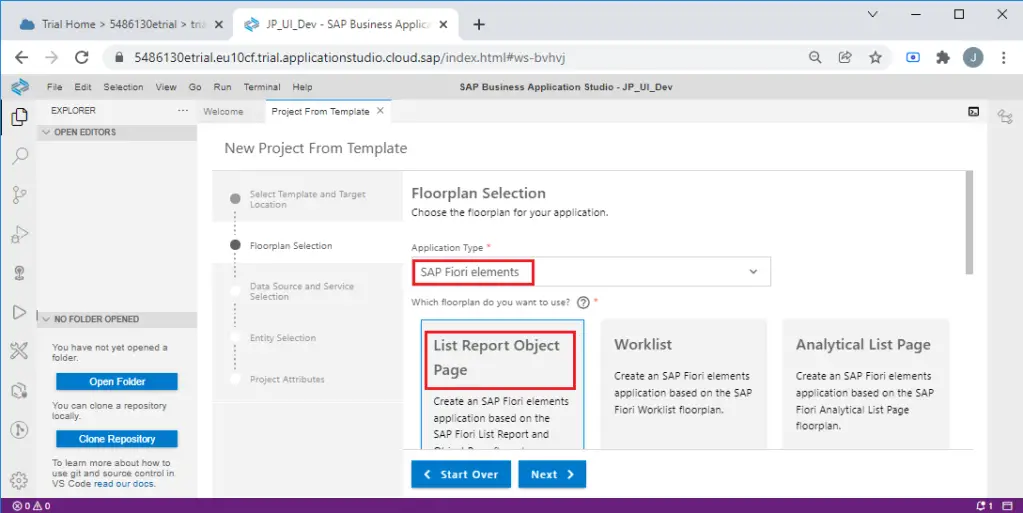
There are 5 Floorplan options available as of today –
- List Report Object Page
- Worklist
- Analytical List Page
- Overview Page
- Form Entry Object Page
Select List Report Object Page. As the service we have created is for single table. This is the most appropriate template.
Click Next.
2.4 Data Source and Service Selection
Select Connect to a system in Data source dropdown, select connection to your abap instance from System. Usually you will have only one system in the dropdown.
From the service dropdown, search and select your service. Click Next.
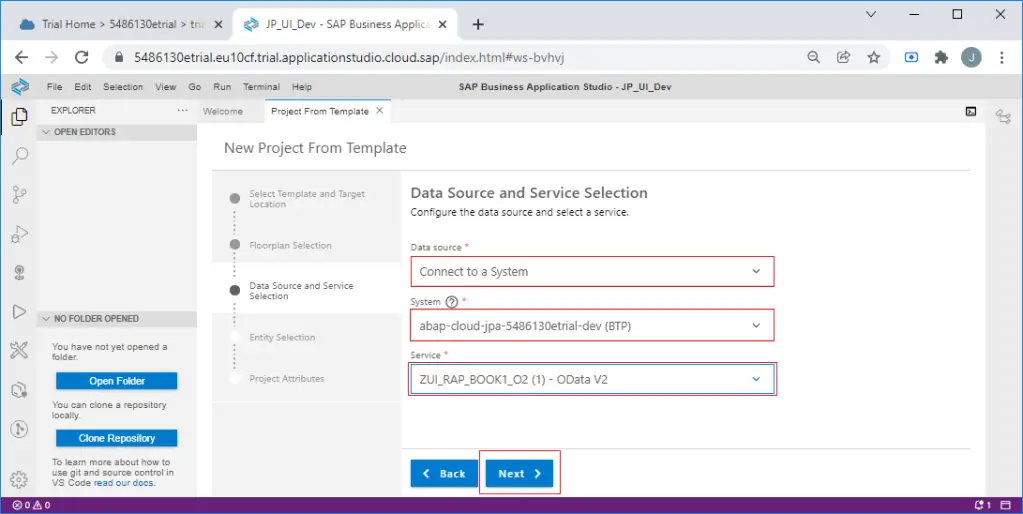
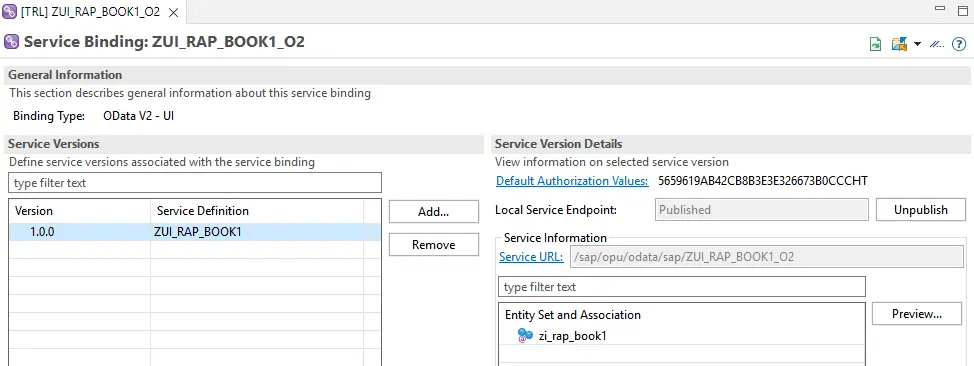
Note: ZUI_RAP_BOOK1_O2 is the service we created in earlier post.
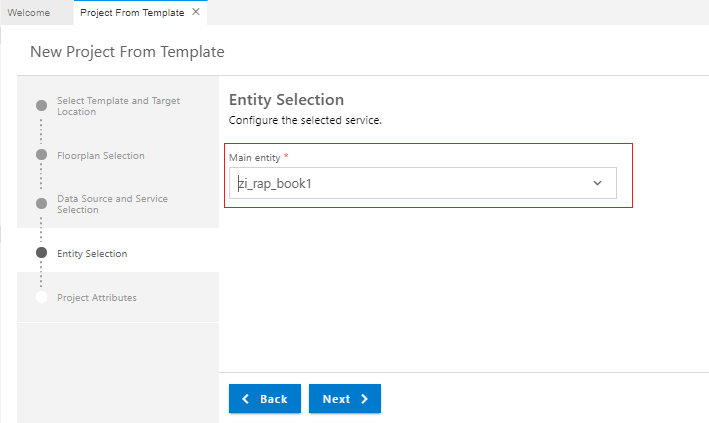
2.5 Entity Selection
This service has only one entity zi_rap_book1. Click Next.
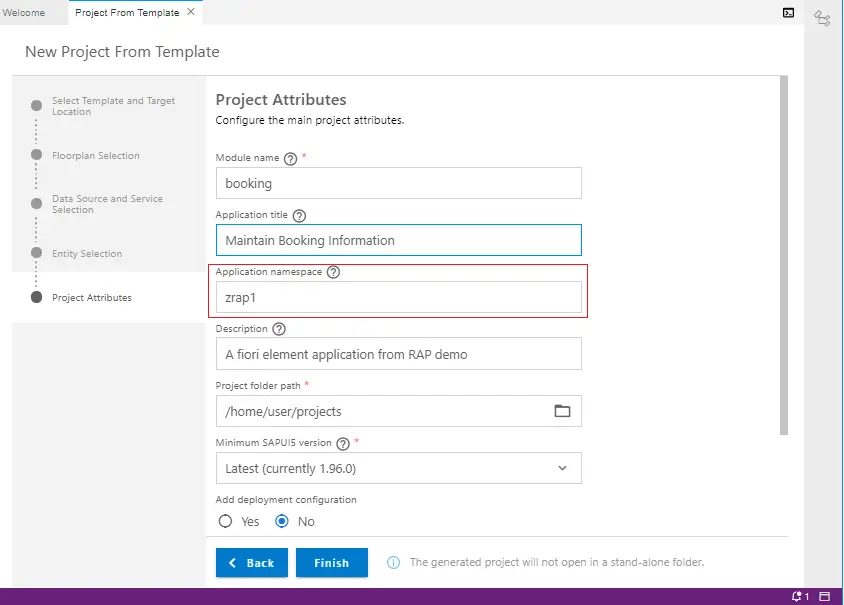
2.6 Project Attribute
Choose meaningful names/text for attributes. Application namespace needs to be unique for each application.
Click Finish.
2.7 The project is created.
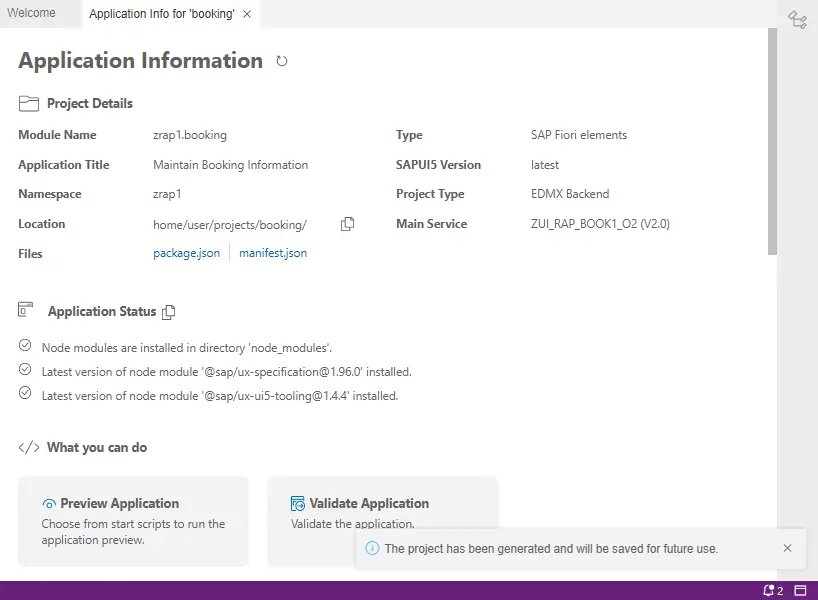
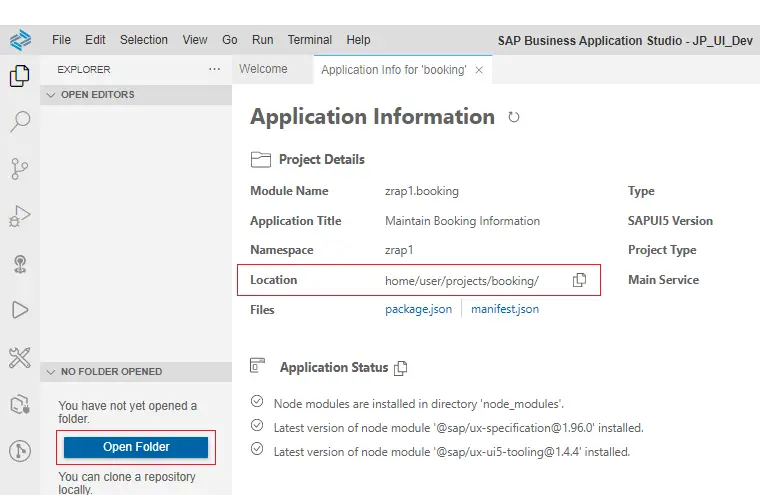
3. Open the Project
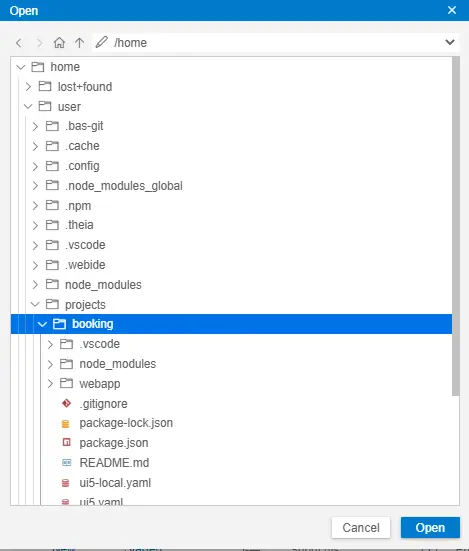
Click on Open Folder and open the Location where the project is stored.
Choose the folder – ‘booking’.
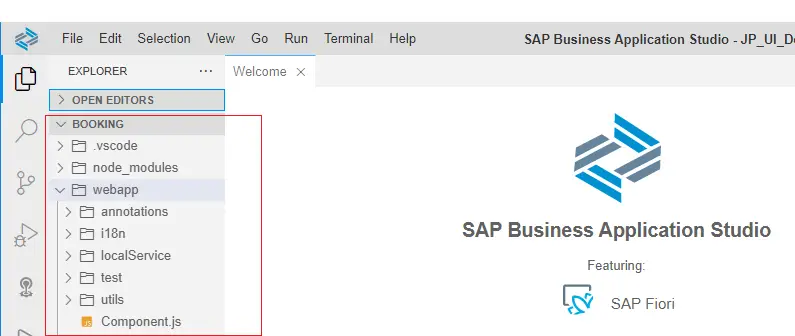
The folder will open.
4. Run the application.
4.1 Right click on the webapp folder and select Preview Application.
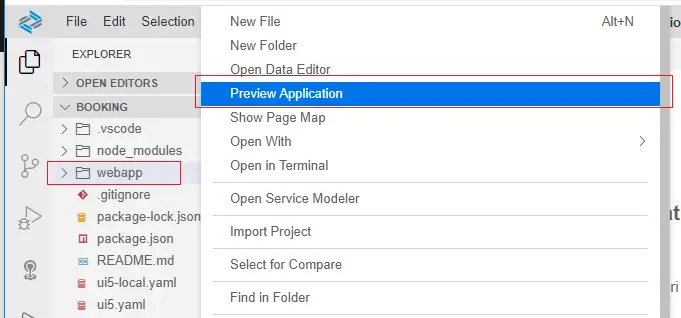
4.2 Select the highlighted option.
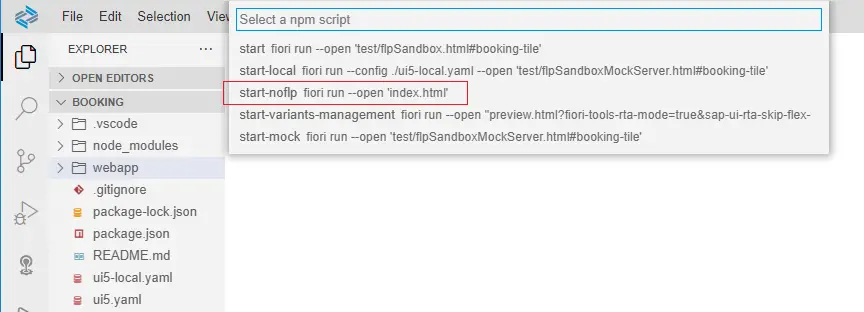
4.3 Command line execution will start and you can see the commands and log at the bottom of the screen.

4.4 You may have to allow pop-ups and run again.
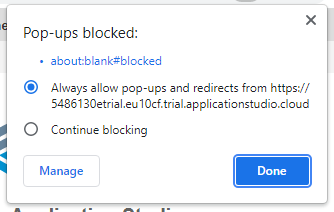
4.5 Application will launch as below.
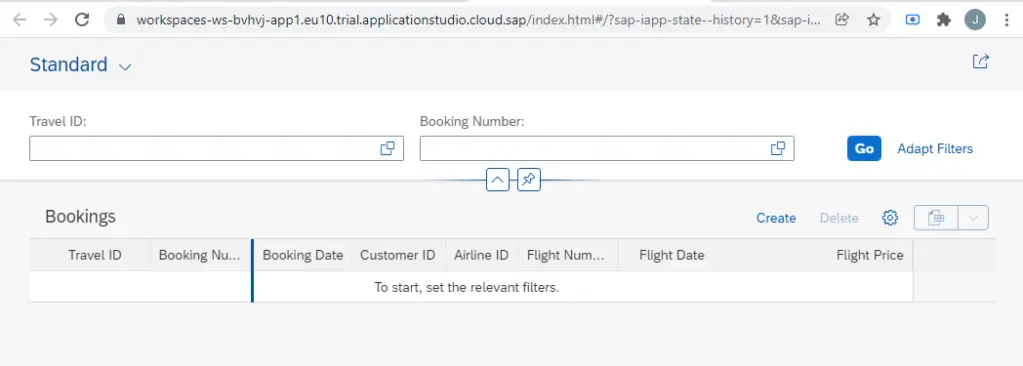
5. Test the application
Click on Go to see the data.

The data is displayed. You can see the Create button to create the data.

Choose any entry to display. This can be used for Edit / Delete the data as well.
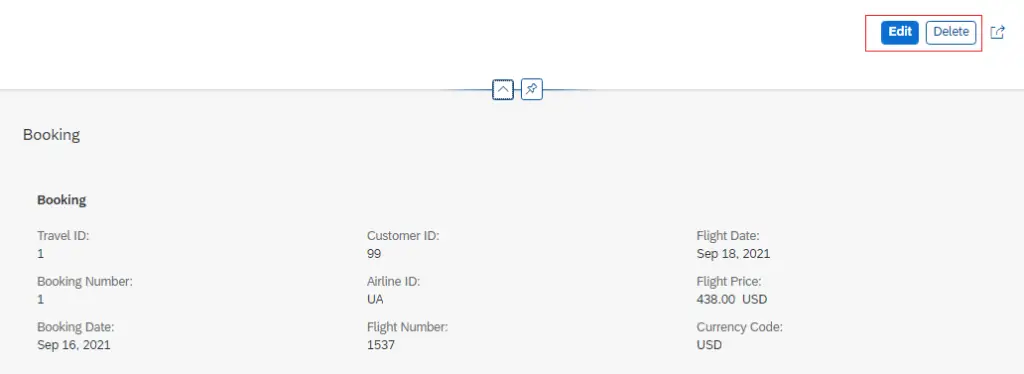
This way, you can create a Fiori Element Application without having to code a single line in UI5.
The metadata extension that we create in the backend controls the display part – i.e. positions, labels etc.
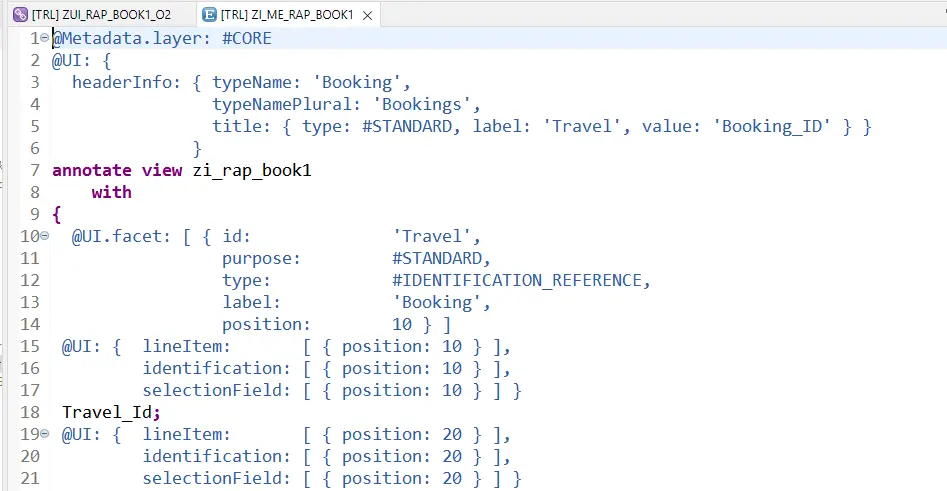
Give this a try and let me know in the comments section in case you face any difficulty.
Visit ABAP RESTful Application Programming Model to explore all articles on ABAP RAP Model.
If you like the content, please subscribe…
Hi Jagadish, Thanks for this blog. I have one issue from my side. I have tried to connect my instance in “Destination” Path but it is not working. Could you please explain how to configure my instance in destination .
LikeLike
Hi Adbul
Can you explain what you are trying to do a bit more? For creating Managed Scenario you should not have to create a destination.
LikeLike
Hi Jagadish,
Step 2.4 Data Source and Service Selection is failed and getting the error as No ABAP Environment found.
Thanks
LikeLike
Hi Kiran , Jagdish ,
facing same problem can you pleas help me if you found solution
LikeLike
Hi Vicky
I was not able to get back on this in time. Hope you got the solution. Else, please let me know.
LikeLike
Hi Kiran
I was not able to get back on this in time. Hope you got the solution. Else, please let me know.
LikeLike
Hi Jagdish,
Usually we see one error when we try to connect to our ABAP environment while connecting to system for fiori application creation. Generally it is asking for cloud foundry login only, then it should be able to found our ABAP environment. They might have introduced it later after you have created the blog. We just have to run the command palatte and perform cf login via SSO code. Once authenticated, our abap environment will be up for selection in Data Source section.
Thought of updating it here since I also struggeled for couple of minutes to understand the error.
Thanks,
Dola
LikeLike