The Object Oriented ABAP series has so far used Eclipse Editor. In this post, I will give Eclipse a break and cover the Global Class creation from SAPGUI Transaction SE24.
The concepts are covered earlier, so this post will only focus on process.
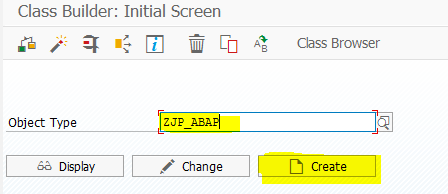
1. Go to SE24, Enter class name and click on Create
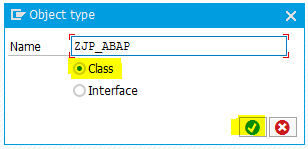
2. Select Class and Enter
3. Add the description, keep rest of the default options same. Click on Save.
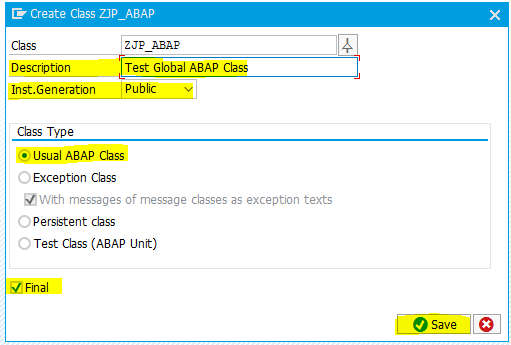
Instance Generation
| Public | Create instance from any ABAP code. |
| Private | Create instance within the same class. Additionally, you will need to create static method to get instance of the class to use it outside of the class. |
| Protected | Create instance within the same class or inherited classes. |
| Abstract | Can not be instantiated. |
Final means class can not be used as superclass for inheritance.
Usual ABAP Class means what it says – its a usual ABAP class.
Other options are as below.
- Exception Classes – Used for class based exception handling
- Persistent Classes – Used to store objects/instances in database
- Test Classes – Refer to ABAP units
I am not going into details of each in this post. Moving on to next step.
4. Select package and TR. (No screenshots for this step)
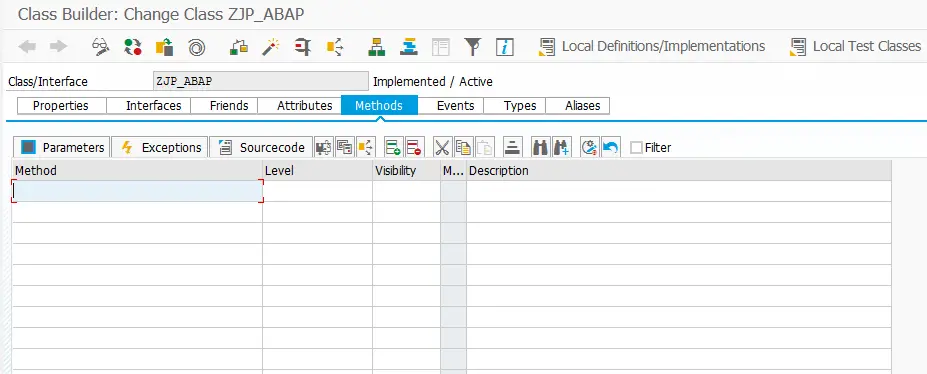
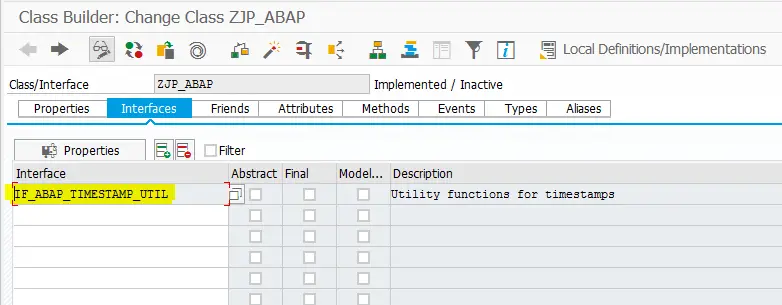
5. Below screen is shown. We have tabs here for Interfaces, Attributes, Methods which we will use in this example. Click on Interfaces tab.
6. Add interface IF_ABAP_TIMESTAMP_UTIL.
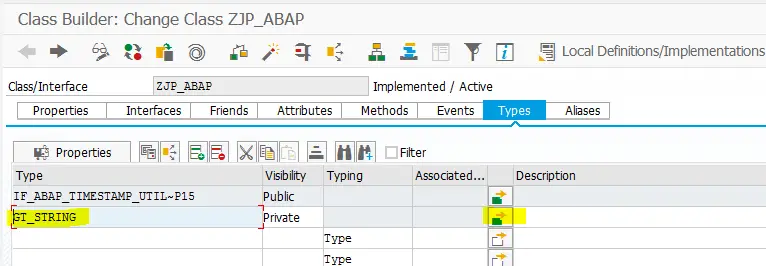
7. In Types tab, add a type GT_STRING, Click on Direct Type Entry button highlighted below and type in the type definition.
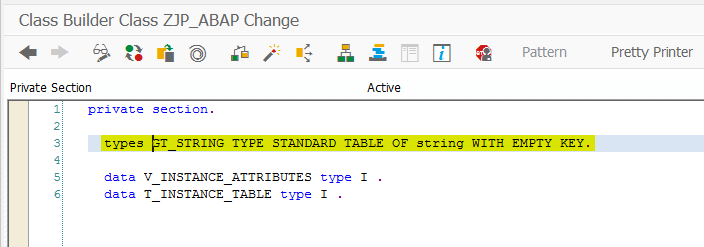
TYPES gt_string TYPE STANDARD TABLE OF string WITH EMPTY KEY.
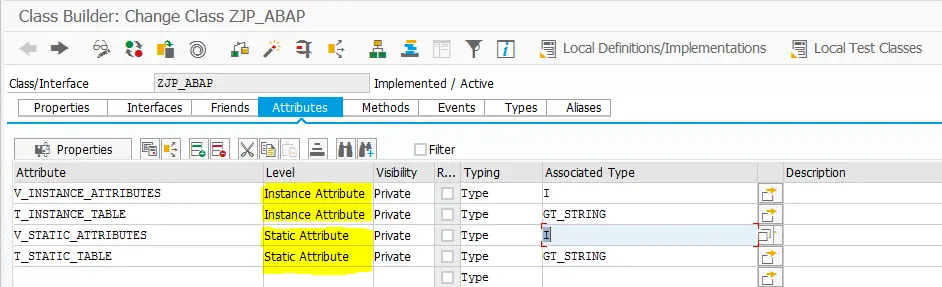
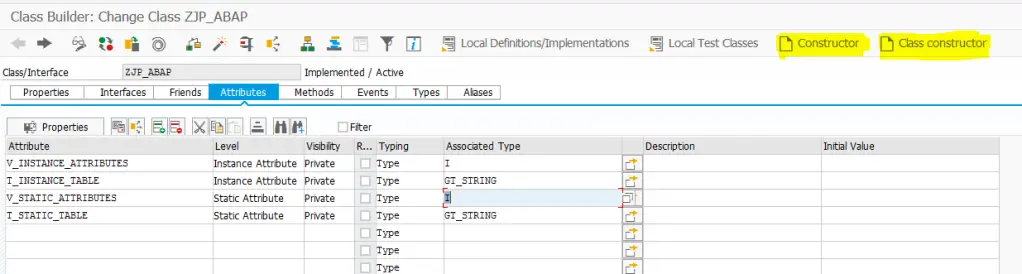
8. In Attributes tab, add instance and static attributes. Select required Level and Visibility here.
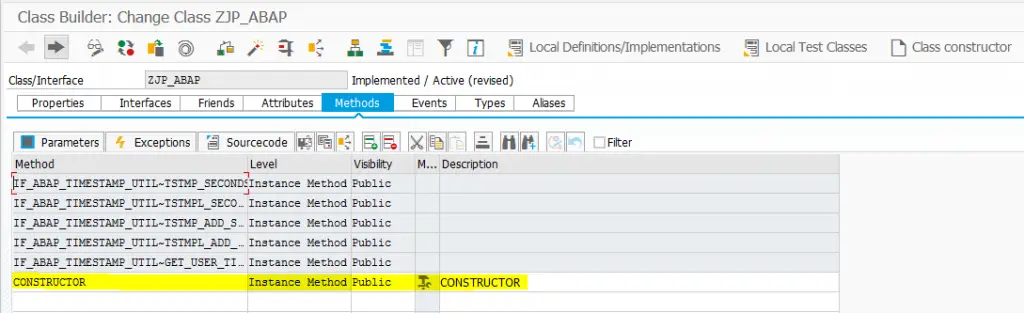
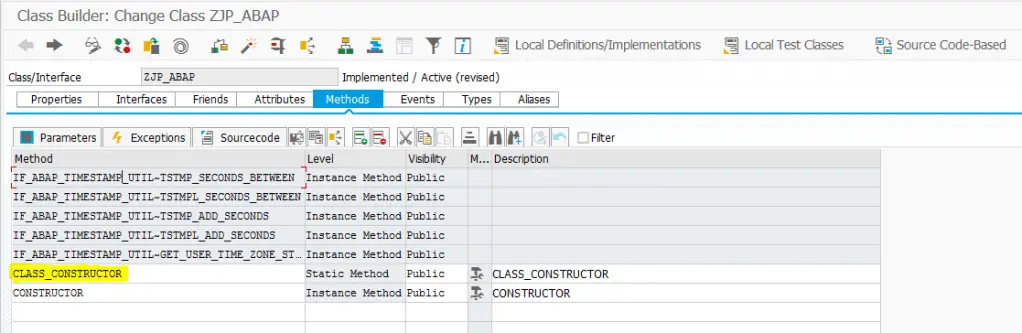
9. Click on Constructor and Class-Constructor buttons to create the instance and static constructors
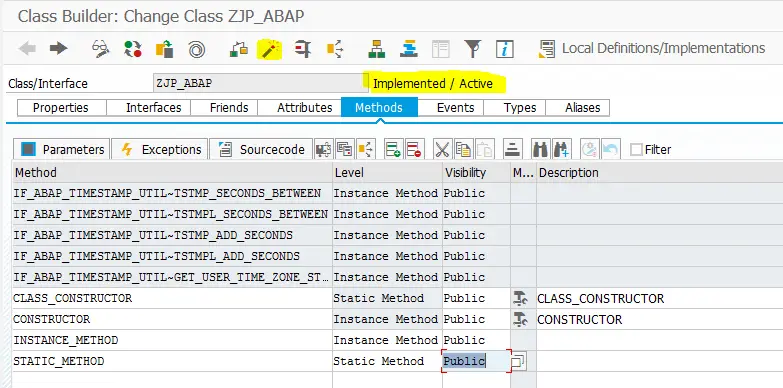
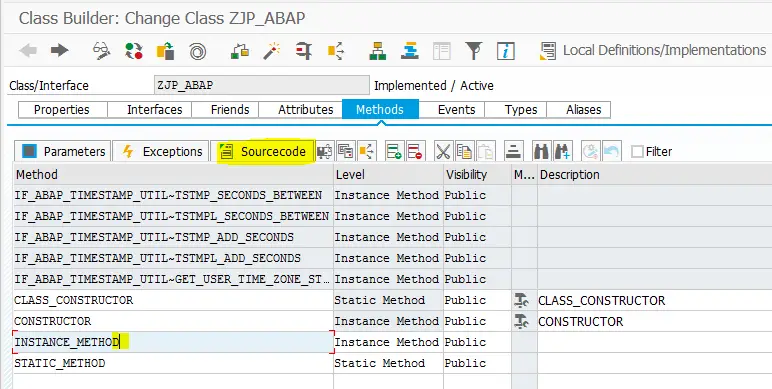
10. In Methods tab, add Instance and Static Methods.
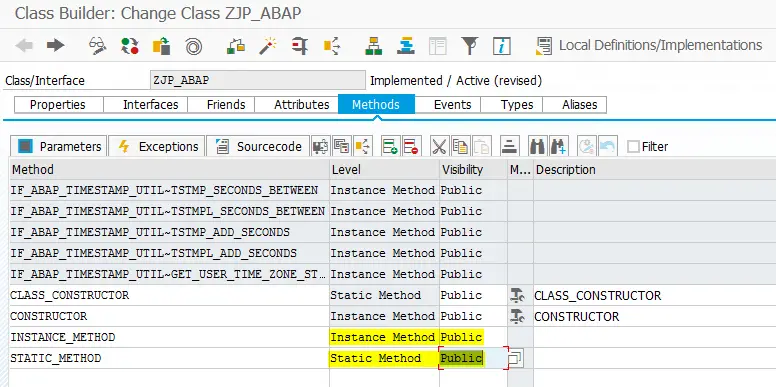
Note that Level determines whether the method is instance or static and not the method name.
11. Activate the class now.
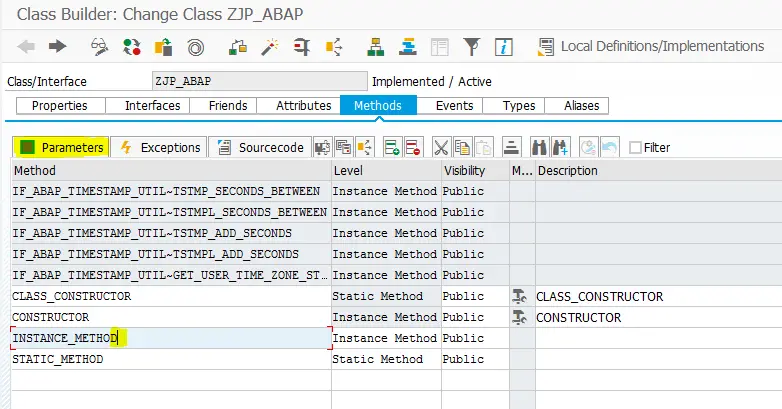
12. To add parameters to a method, keep the cursor on the method name and click on Parameters.
13. Add parameter name, type and associated type.
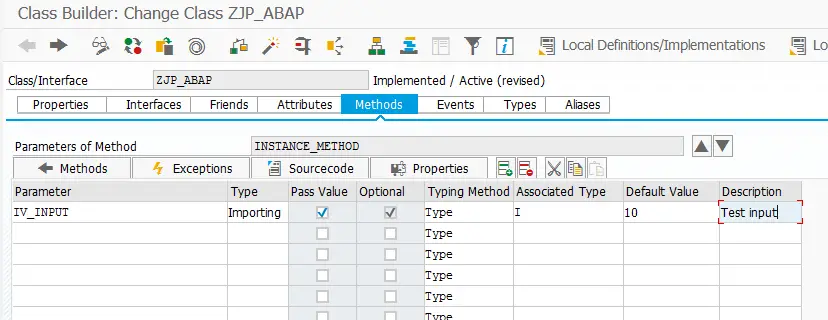
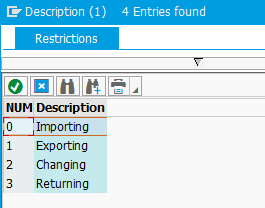
Parameter types can be any one of below
- Pass Value – When it is checked pass by value method is used, else pass by reference is used.
- Optional – Optional / Mandatory parameter
- Default Value – Mention a default value to be used when value is not passed while calling the method
14. Now, its time to add the code. Keep the cursor on method and click on Sourcecode.
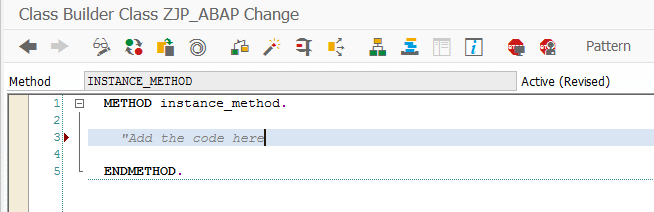
15. Add the method code
16. Repeat this process to add code in all methods, activate and you are done.
Important:
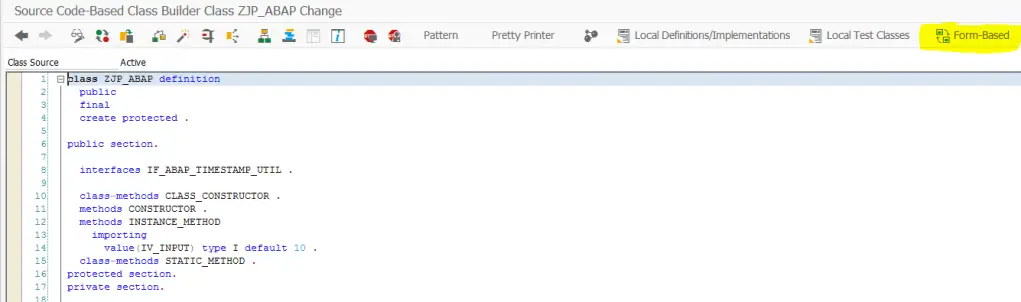
As you can see, we need to move to lot of tabs, screens to work with the class. This can be reduced by using a source code based editor.
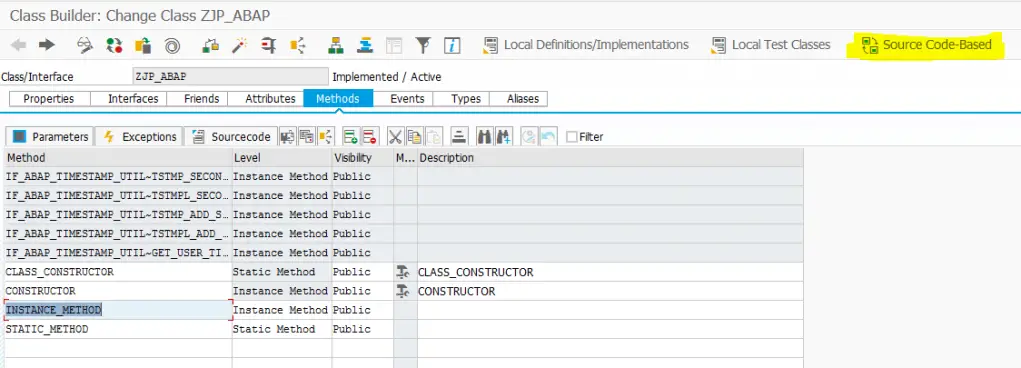
Source Code based editor
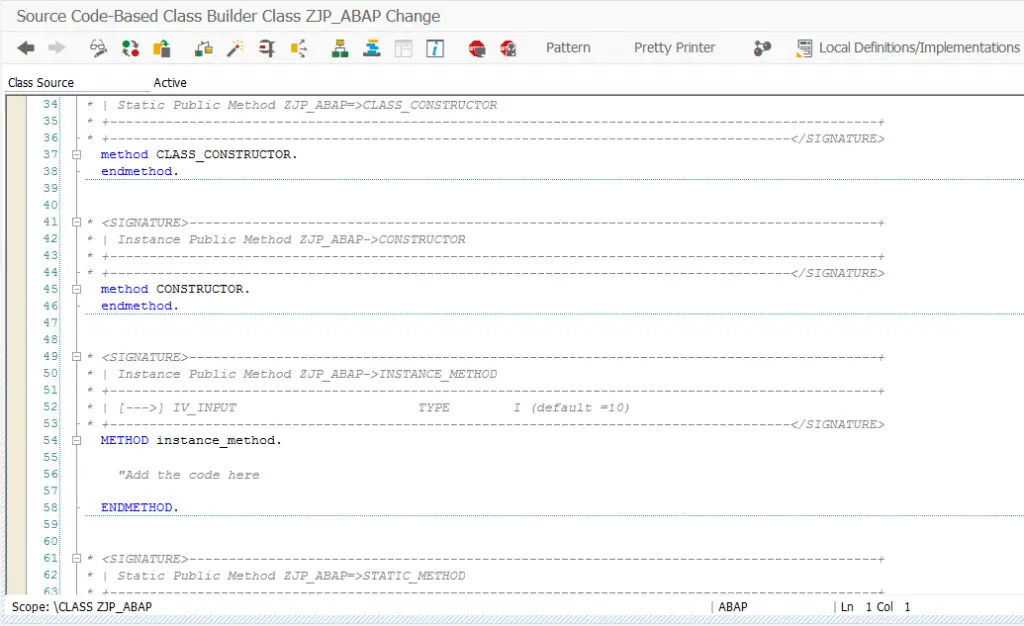
To switch back use Form-Based button.
One of the reason to switch to Eclipse editor is ease with which we can create classes without having to constantly switch between lot of tabs. Also, the way we create local classes and global classes becomes identical and gets easier with practice.
For more posts on Object Oriented ABAP, please visit the page OOABAP.
If you like the content, please subscribe…
