This series covers all the details about ABAP debugging. If you have landed on this post directly, I recommend reading earlier posts as this post assumes that the reader has knowledge of concepts and steps covered in earlier posts.
This post talks about the controls to be used in ABAP Debugger.
Find a sample program to debug
Find any simple program to debug. If you are not able to find one, use below code to create a new program in transaction SE38.
REPORT zjp_abap_debugger.
DATA : bookings TYPE STANDARD TABLE OF sbook.
START-OF-SELECTION.
PERFORM get_data.
END-OF-SELECTION.
PERFORM display.
IF 1 = 2. "Dummy statements
ENDIF.
*&---------------------------------------------------------------------*
*& Form GET_DATA
*&---------------------------------------------------------------------*
* text
*----------------------------------------------------------------------*
* --> p1 text
* <-- p2 text
*----------------------------------------------------------------------*
FORM get_data .
SELECT * FROM sbook INTO TABLE @bookings.
ENDFORM.
*&---------------------------------------------------------------------*
*& Form DISPLAY
*&---------------------------------------------------------------------*
* text
*----------------------------------------------------------------------*
* --> p1 text
* <-- p2 text
*----------------------------------------------------------------------*
FORM display .
TRY.
"Create ALV table object for the output data table
cl_salv_table=>factory( IMPORTING r_salv_table = DATA(lo_tab)
CHANGING t_table = bookings ).
lo_tab->get_functions( )->set_all( ).
lo_tab->get_columns( )->set_optimize( ).
lo_tab->get_display_settings( )->set_striped_pattern( abap_true ).
lo_tab->display( ).
CATCH cx_root.
MESSAGE 'Error in ALV creation' TYPE 'E'.
ENDTRY.
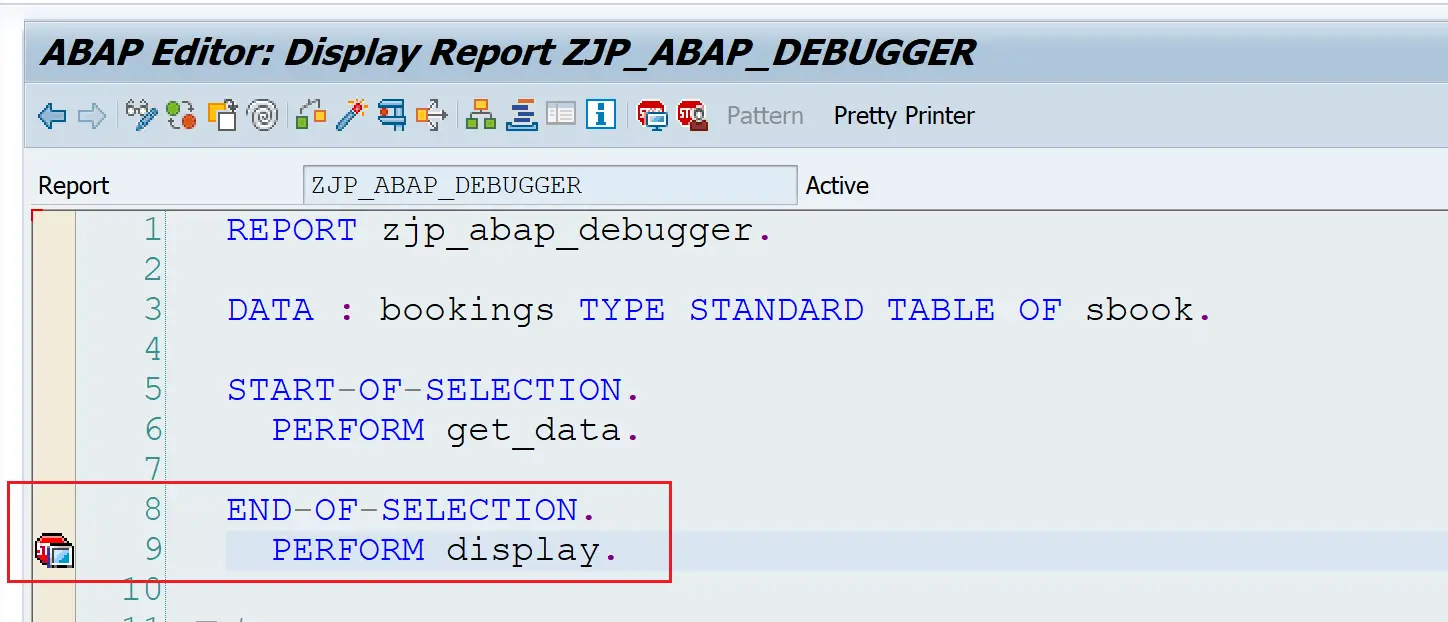
ENDFORM.Set a breakpoint and Execute
Open the program in SE38 and set up a session breakpoint.
Now, execute the program using F8 or use below highlighted button.
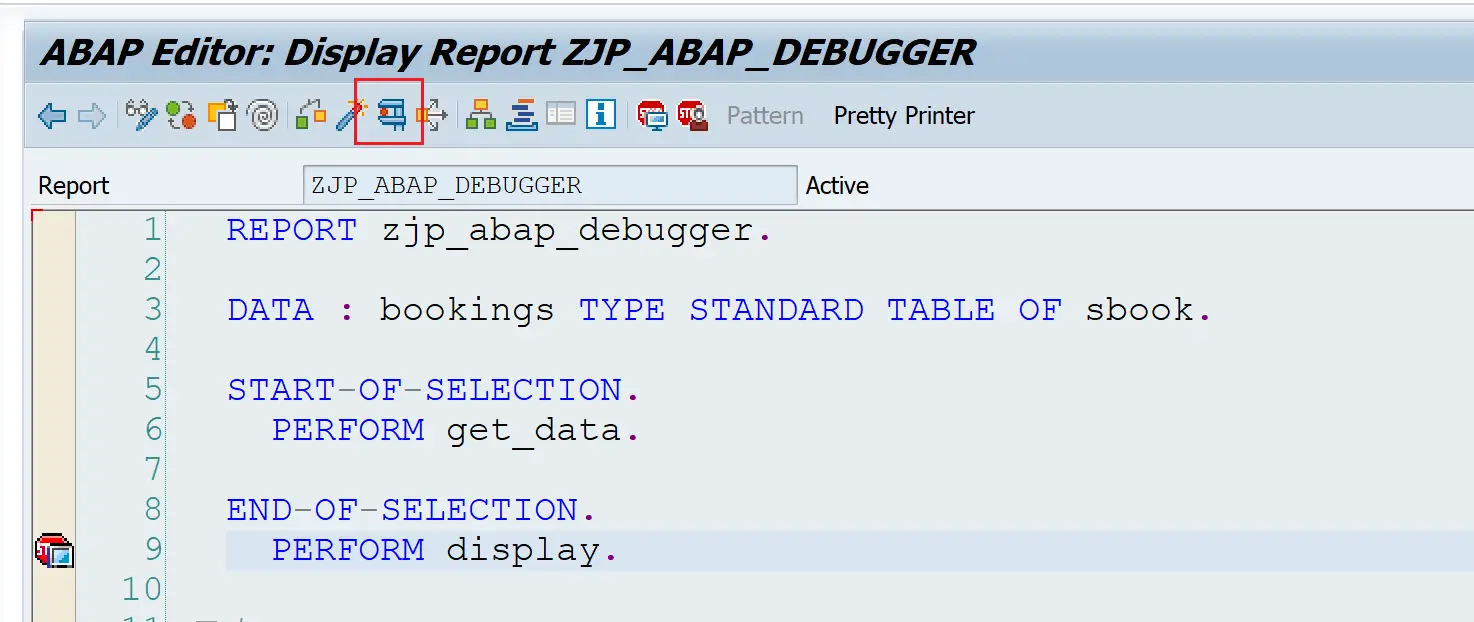
The New Debugger will start.
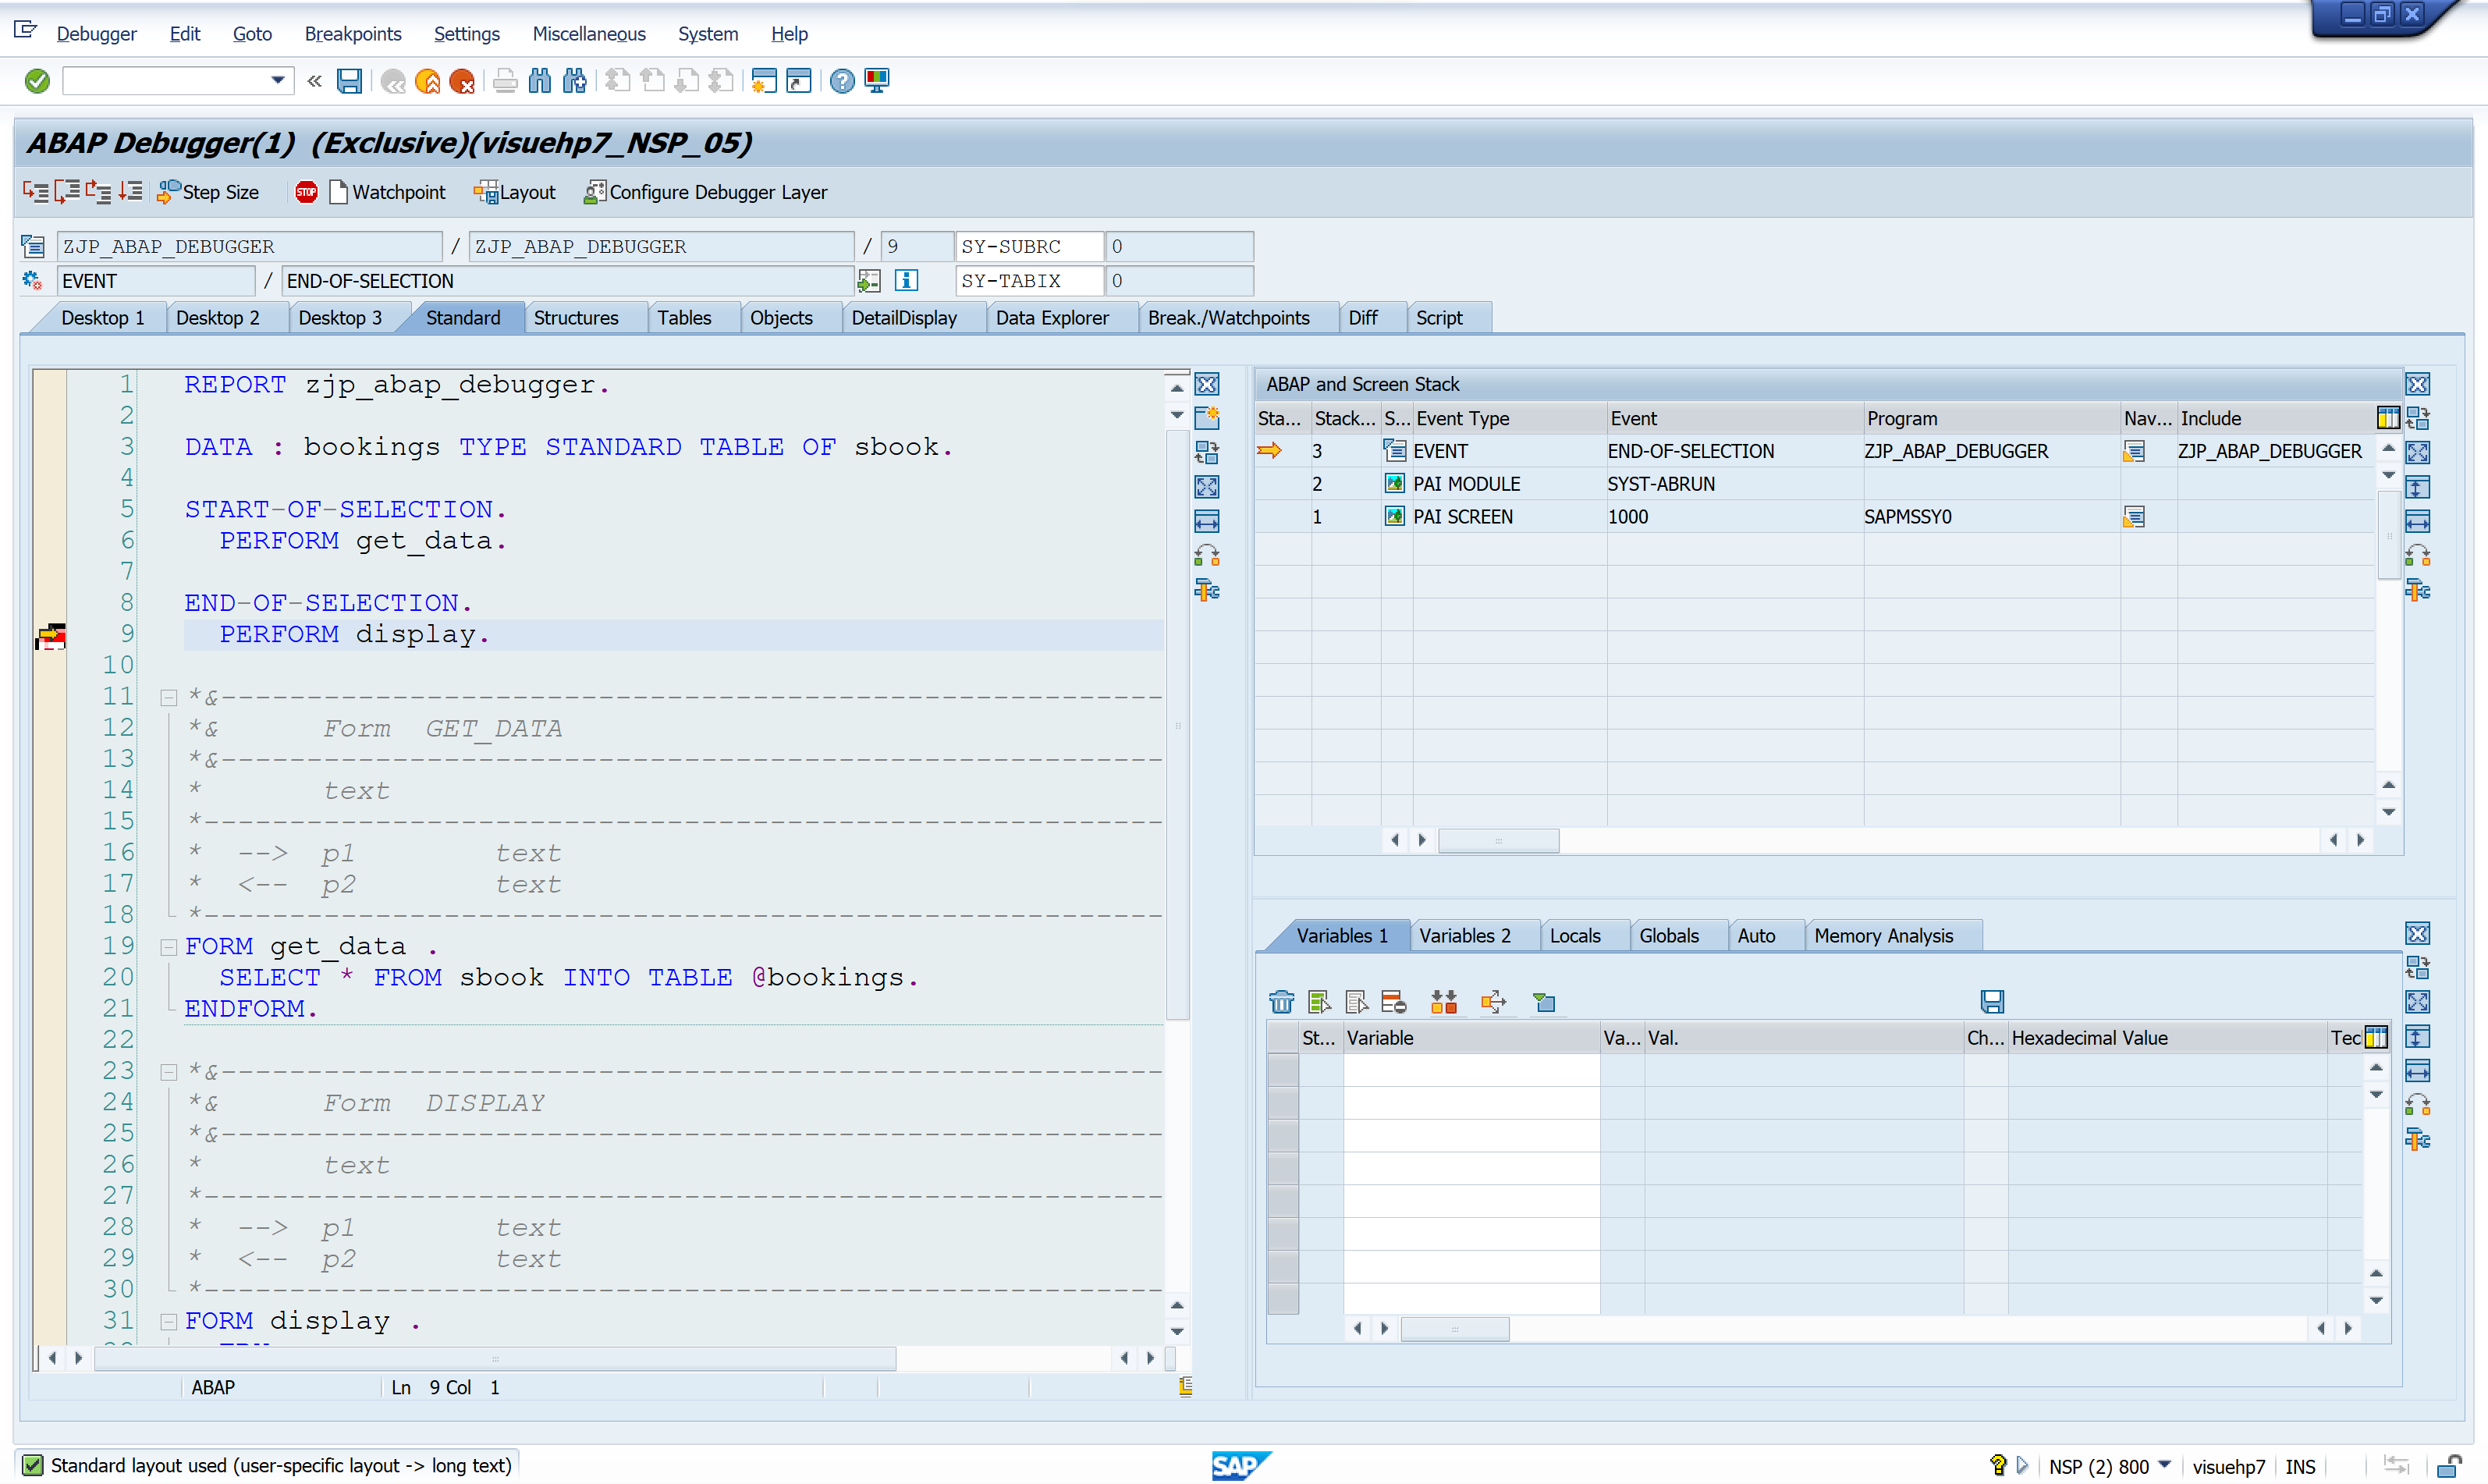
Note that the break-points can be set of removed using the left hand side margin where you can see the breakpoint icon.
Controls/keys to be used for debugging
Keys or buttons to be used for debugging can be found on application toolbar.
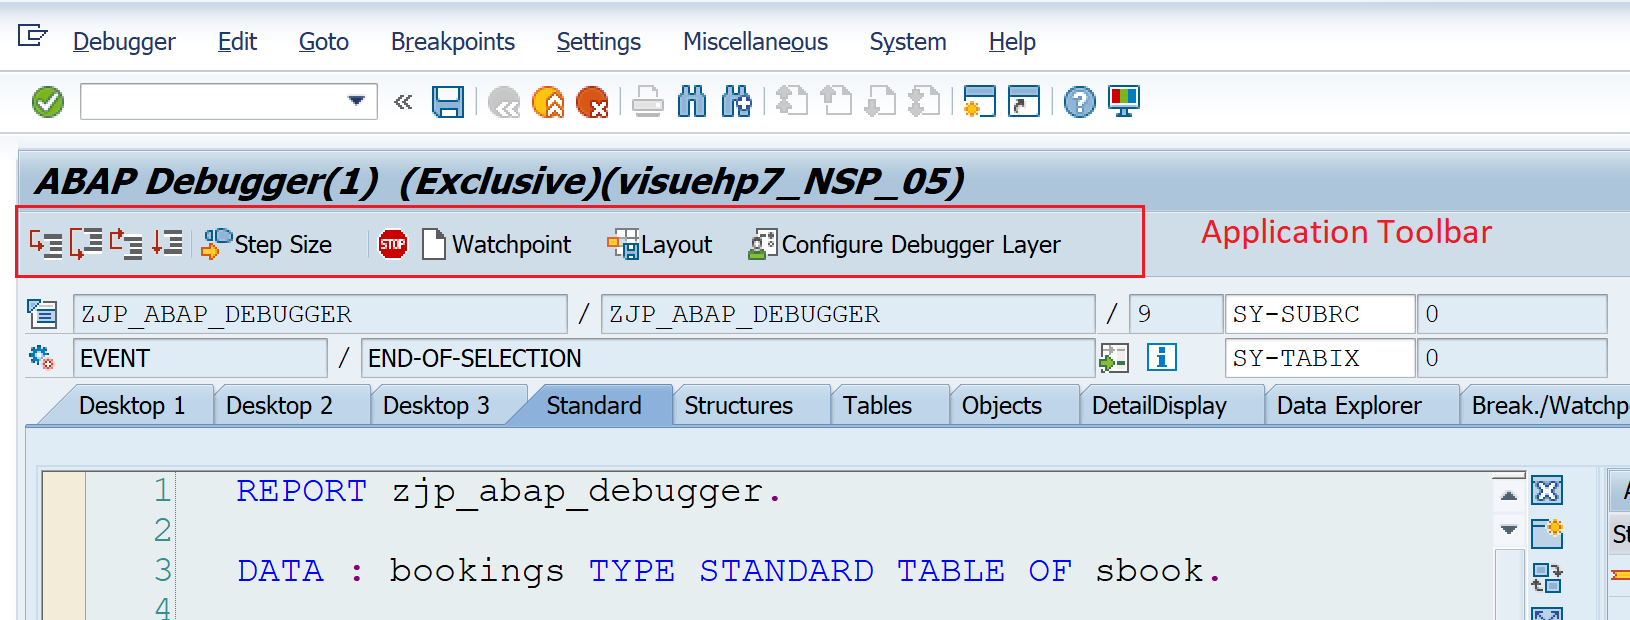
Similar options can also be found in the menu option Debugger.
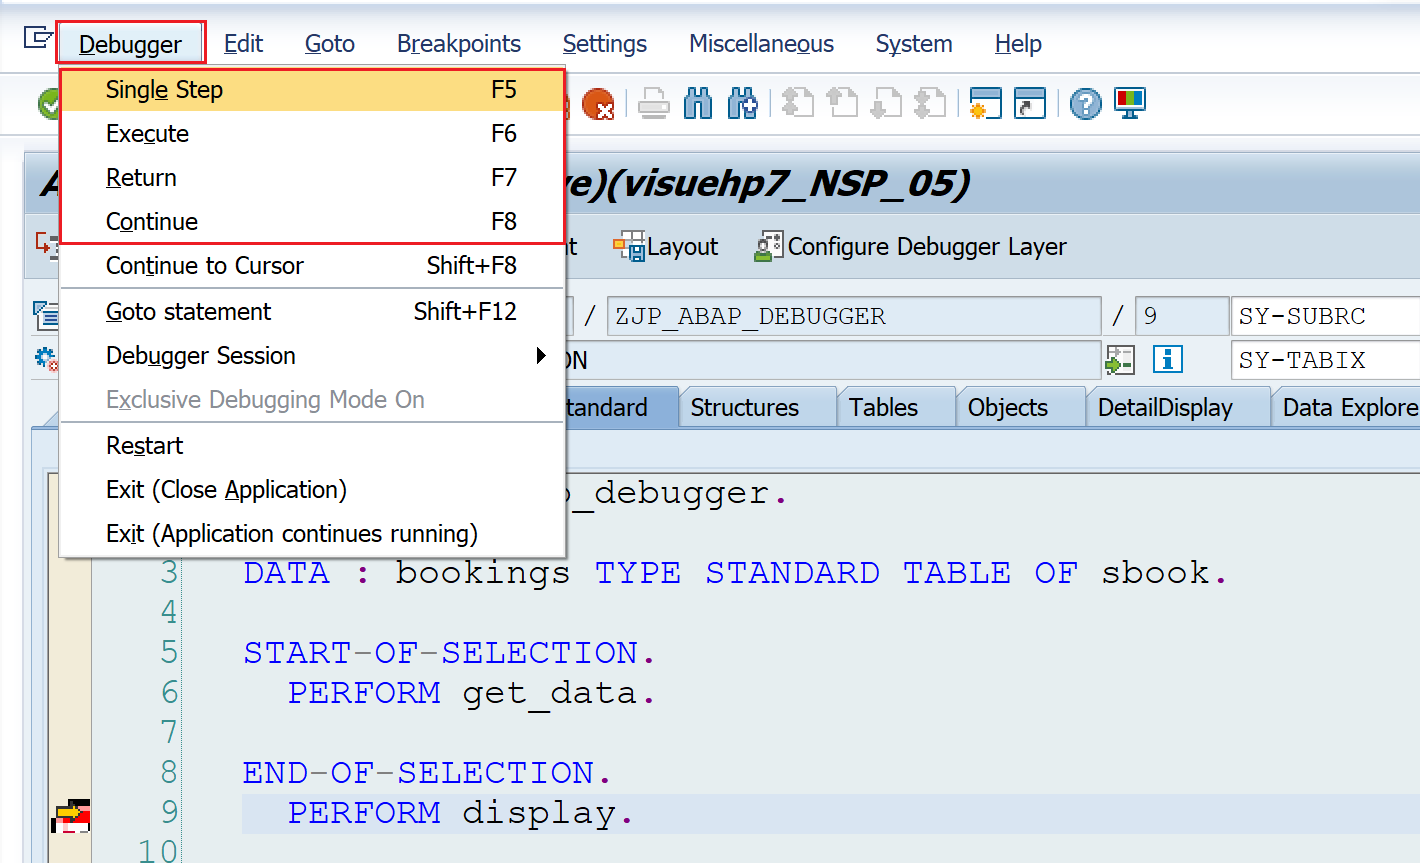
However, the most convenient way that any SAP ABAP Developer uses is the function keys F5, F6, F7, and F8.
Important Tip
If your laptop would usually have a function key and action key combined and when you try to press say F5 instead of the debugging the brightness changes. In this case check the function lock key (usually shift or ESC) on your keyboard and toggle the function lock to get the F5, F6, F7 and F8 keys working by default.
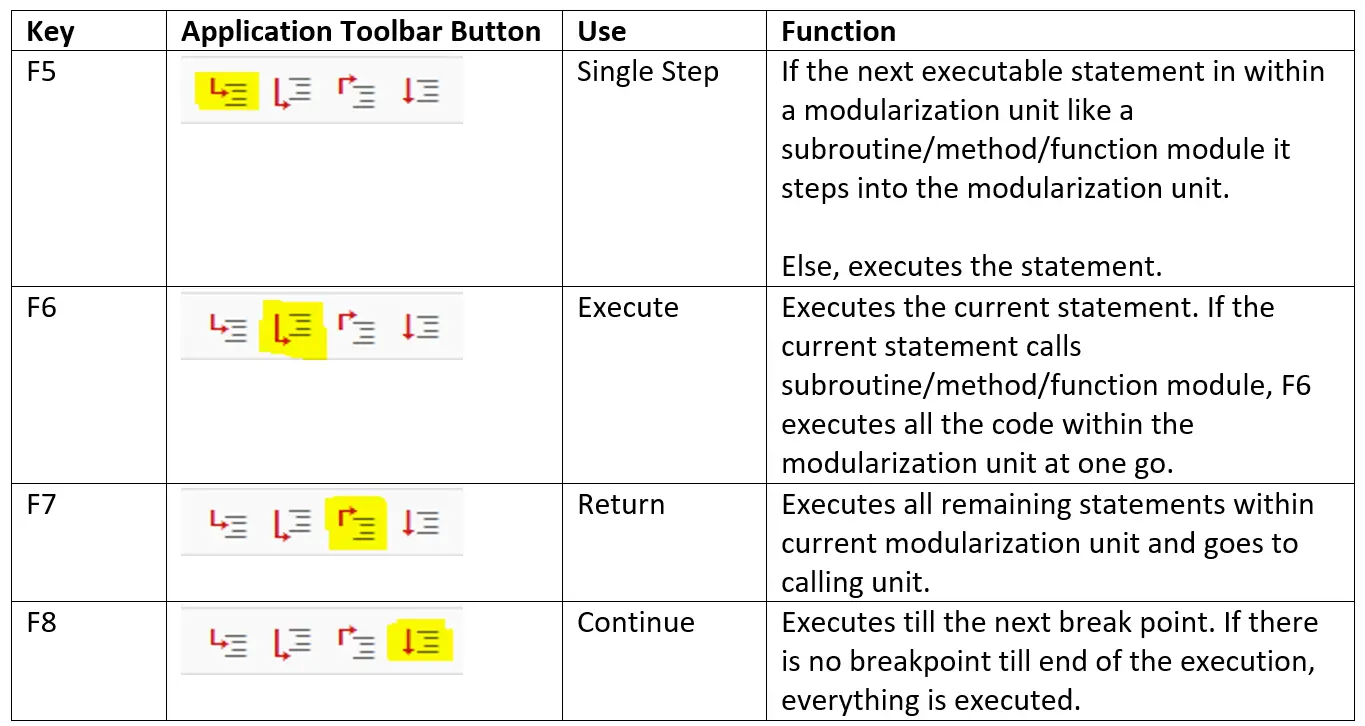
F5 / Single Step
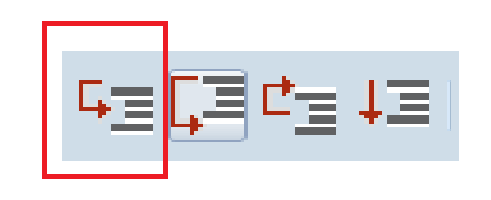
If the next executable statement in within a modularization unit like a subroutine/method/function module it steps into the modularization unit. Else, executes the statement.
F6 / Execute
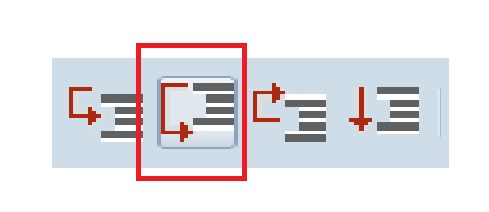
Executes all remaining statements within current modularization unit and goes to calling unit.
F7 / Return
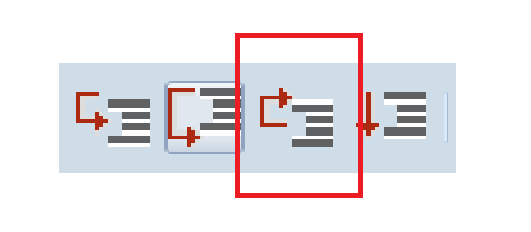
Executes the current statement. If the current statement calls subroutine/method/function module, F6 executes all the code within the modularization unit at one go.
F8 / Continue

Executes till the next break point. If there is no breakpoint till end of the execution, everything is executed.
Here is the quick summary –
Example Execution
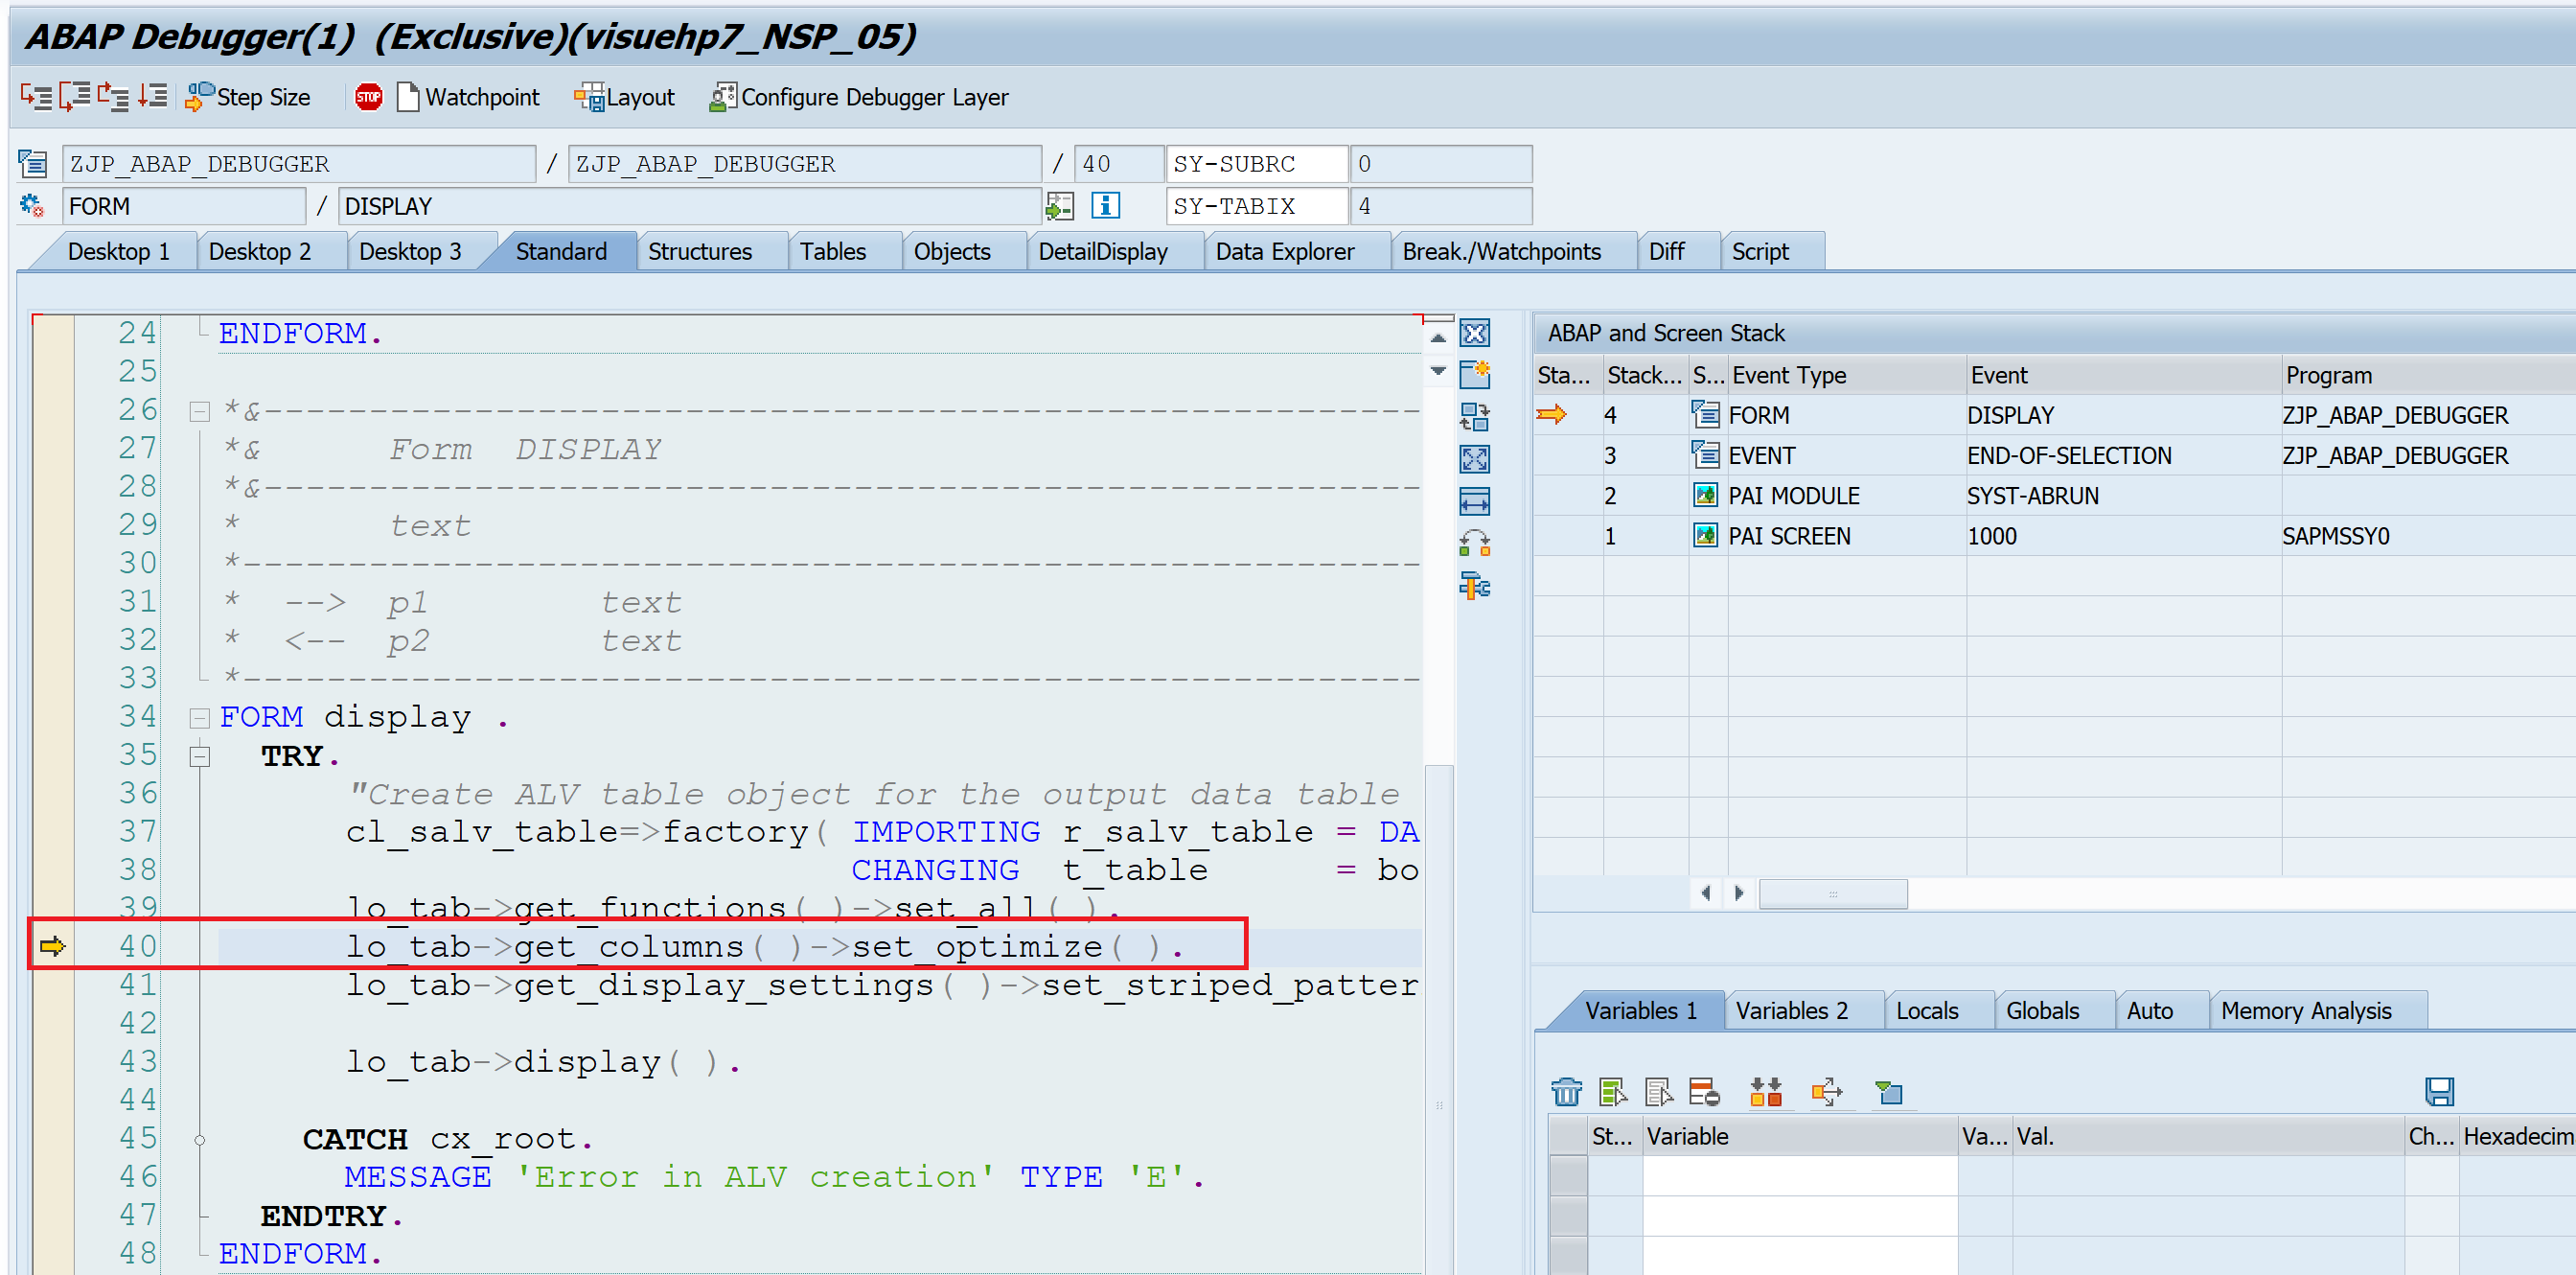
F5 / Single Step
Use this at subroutine call (perform), method call, function module call etc to enter inside the subroutine, method, function module respectively.
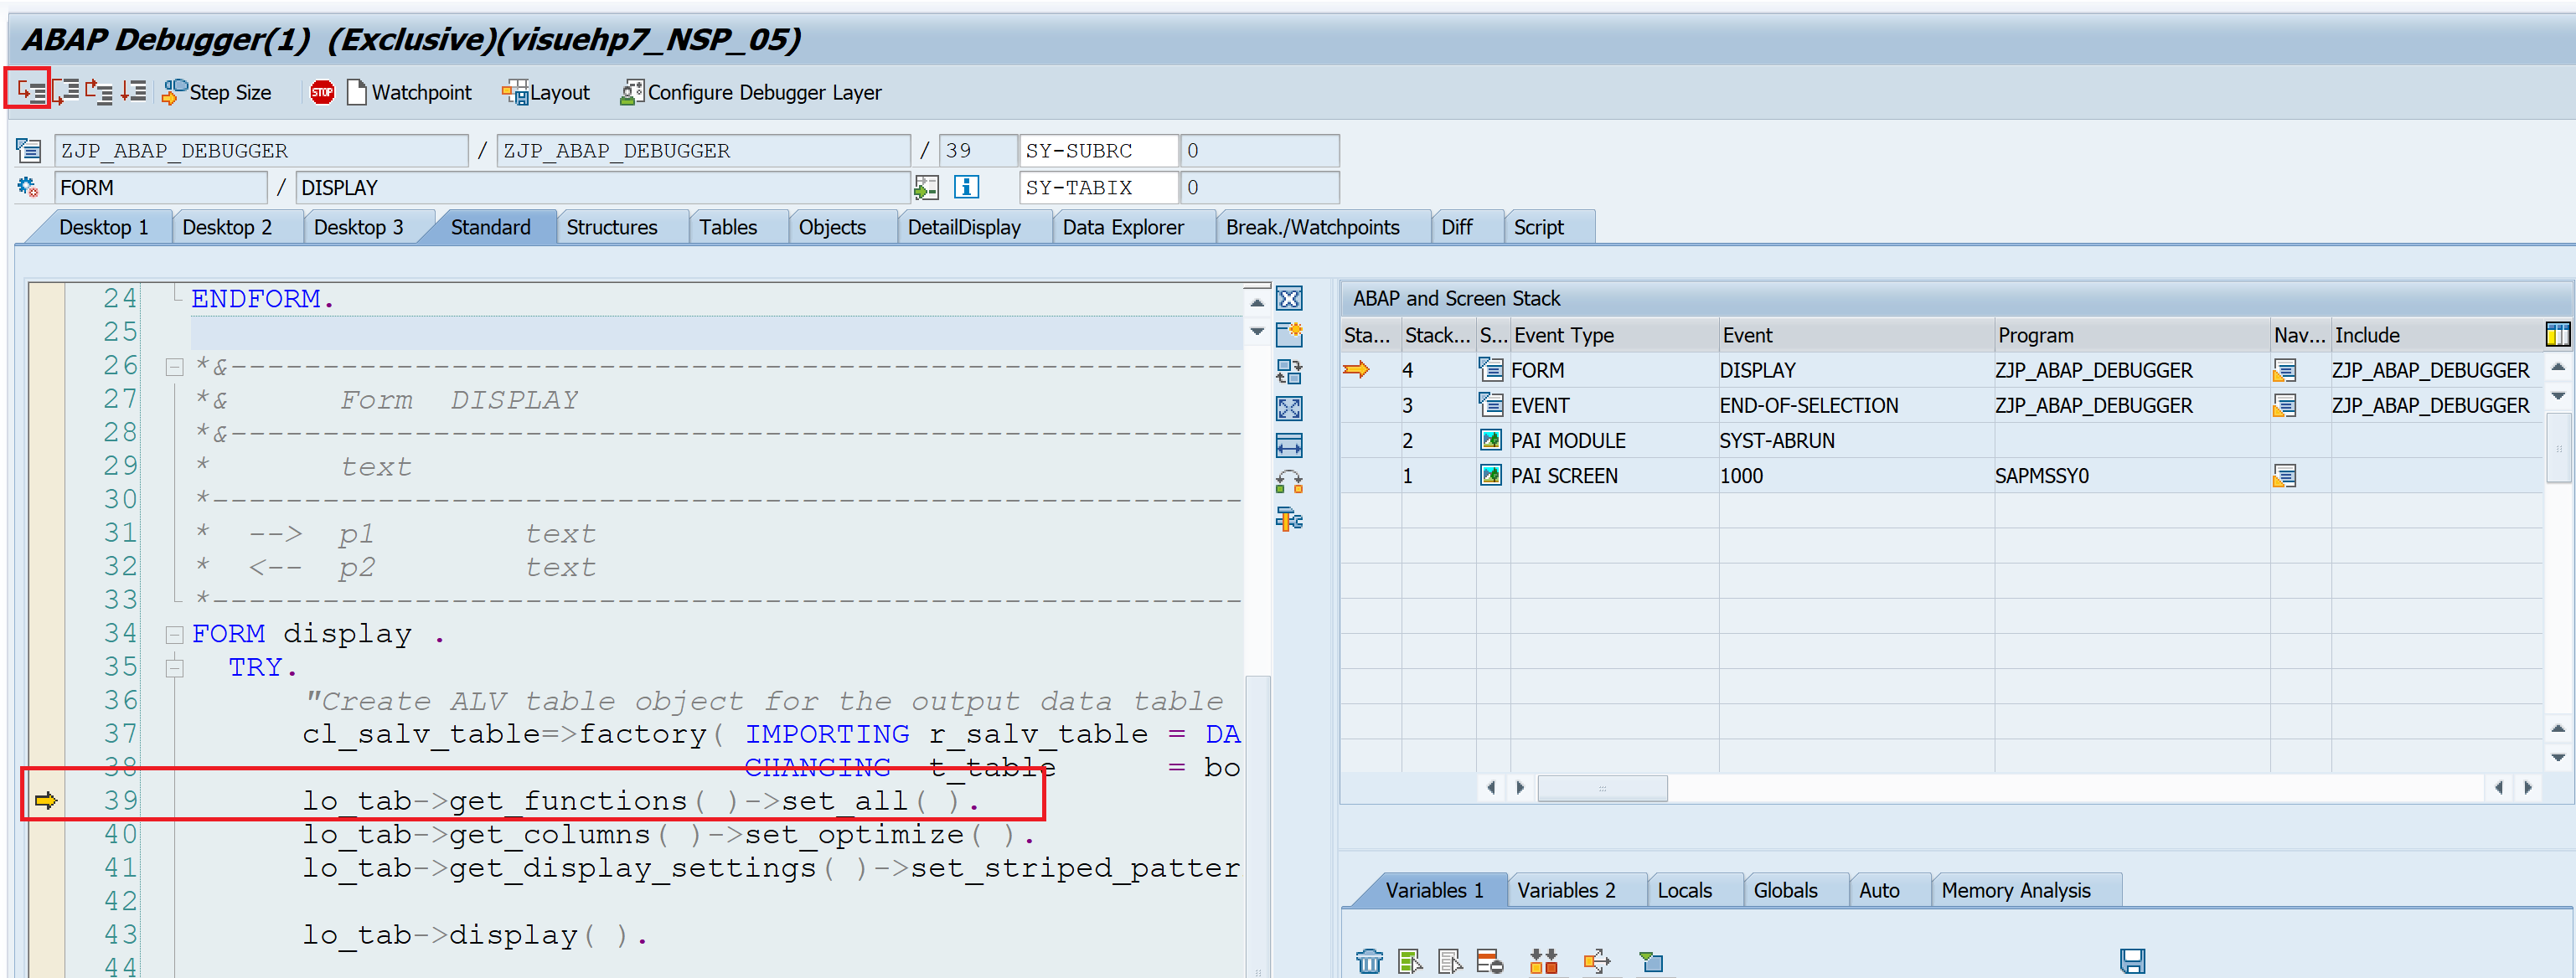
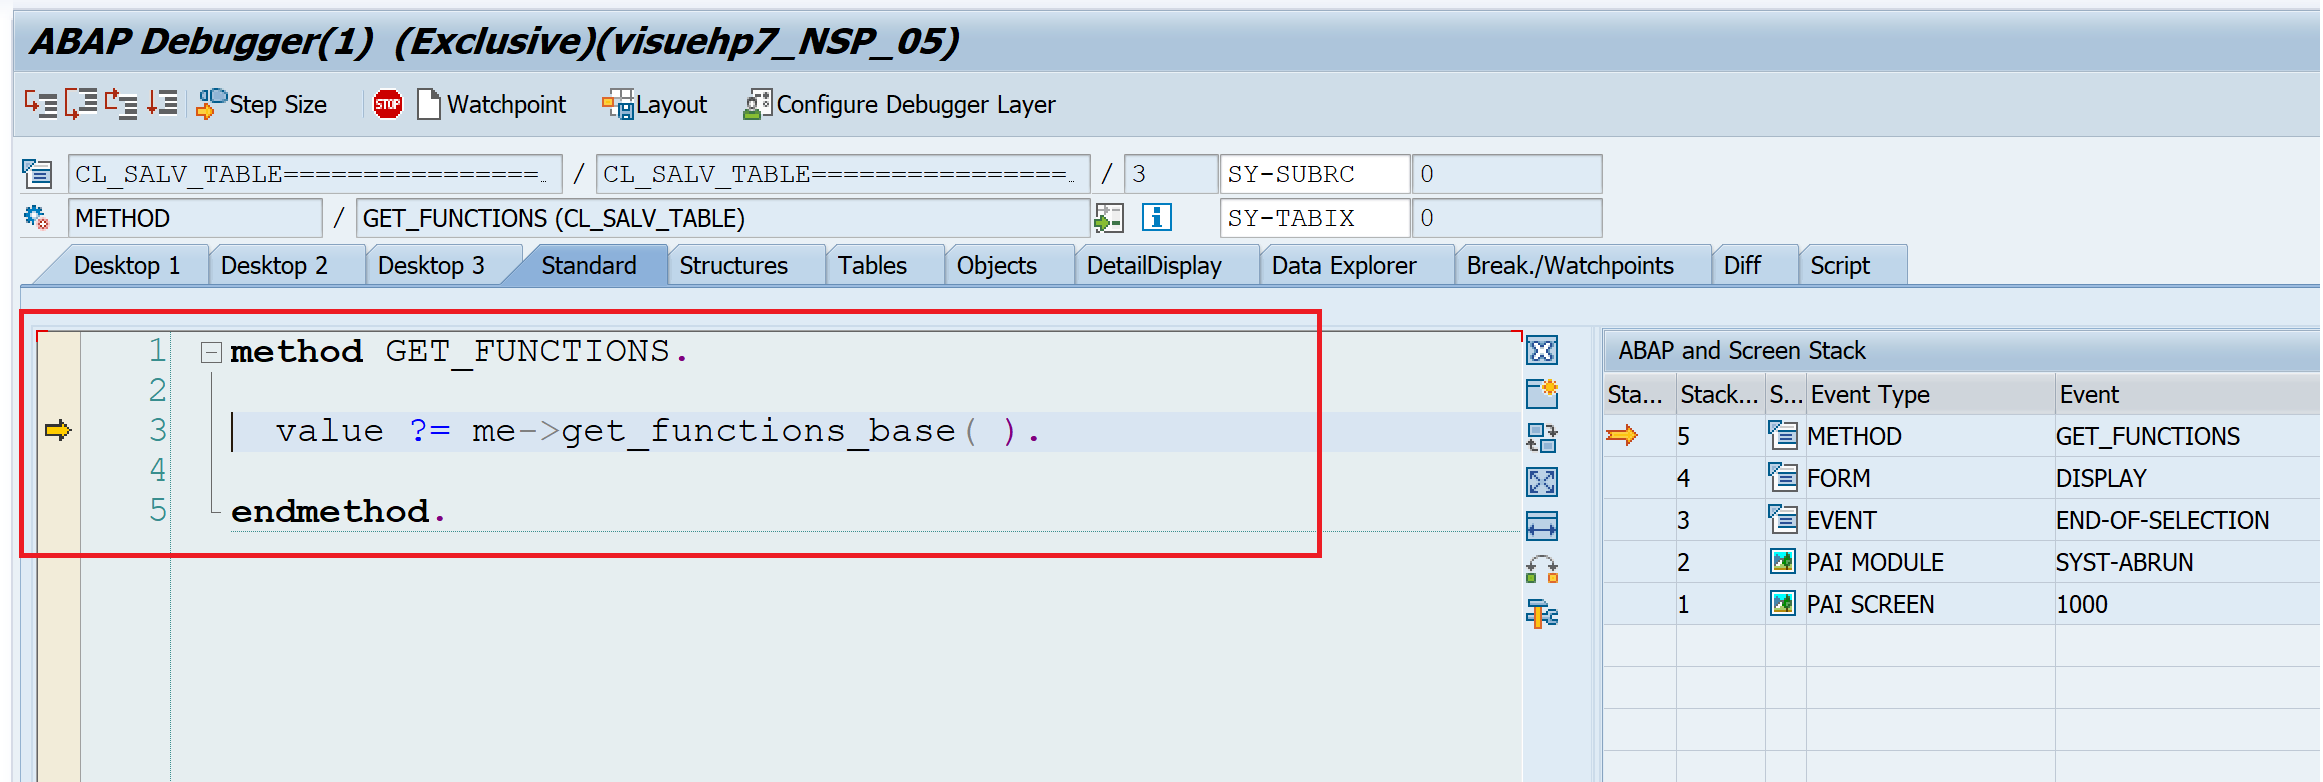
After F5
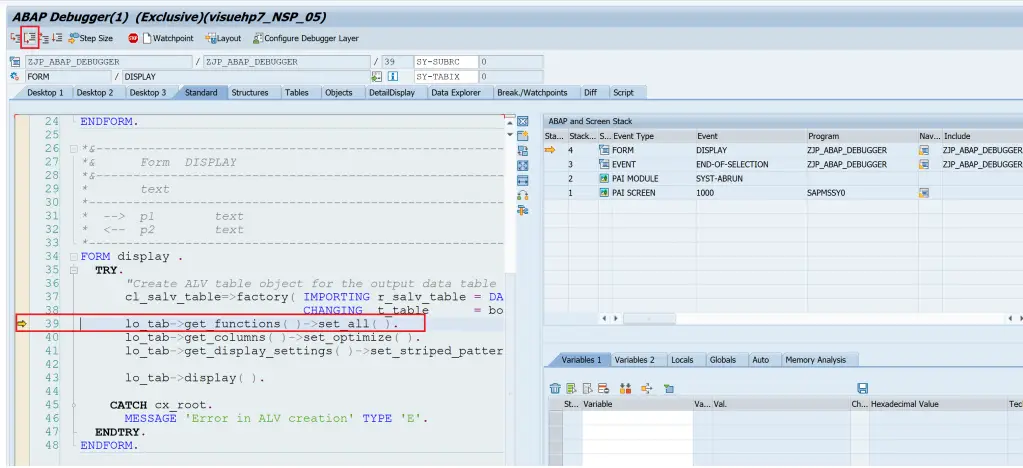
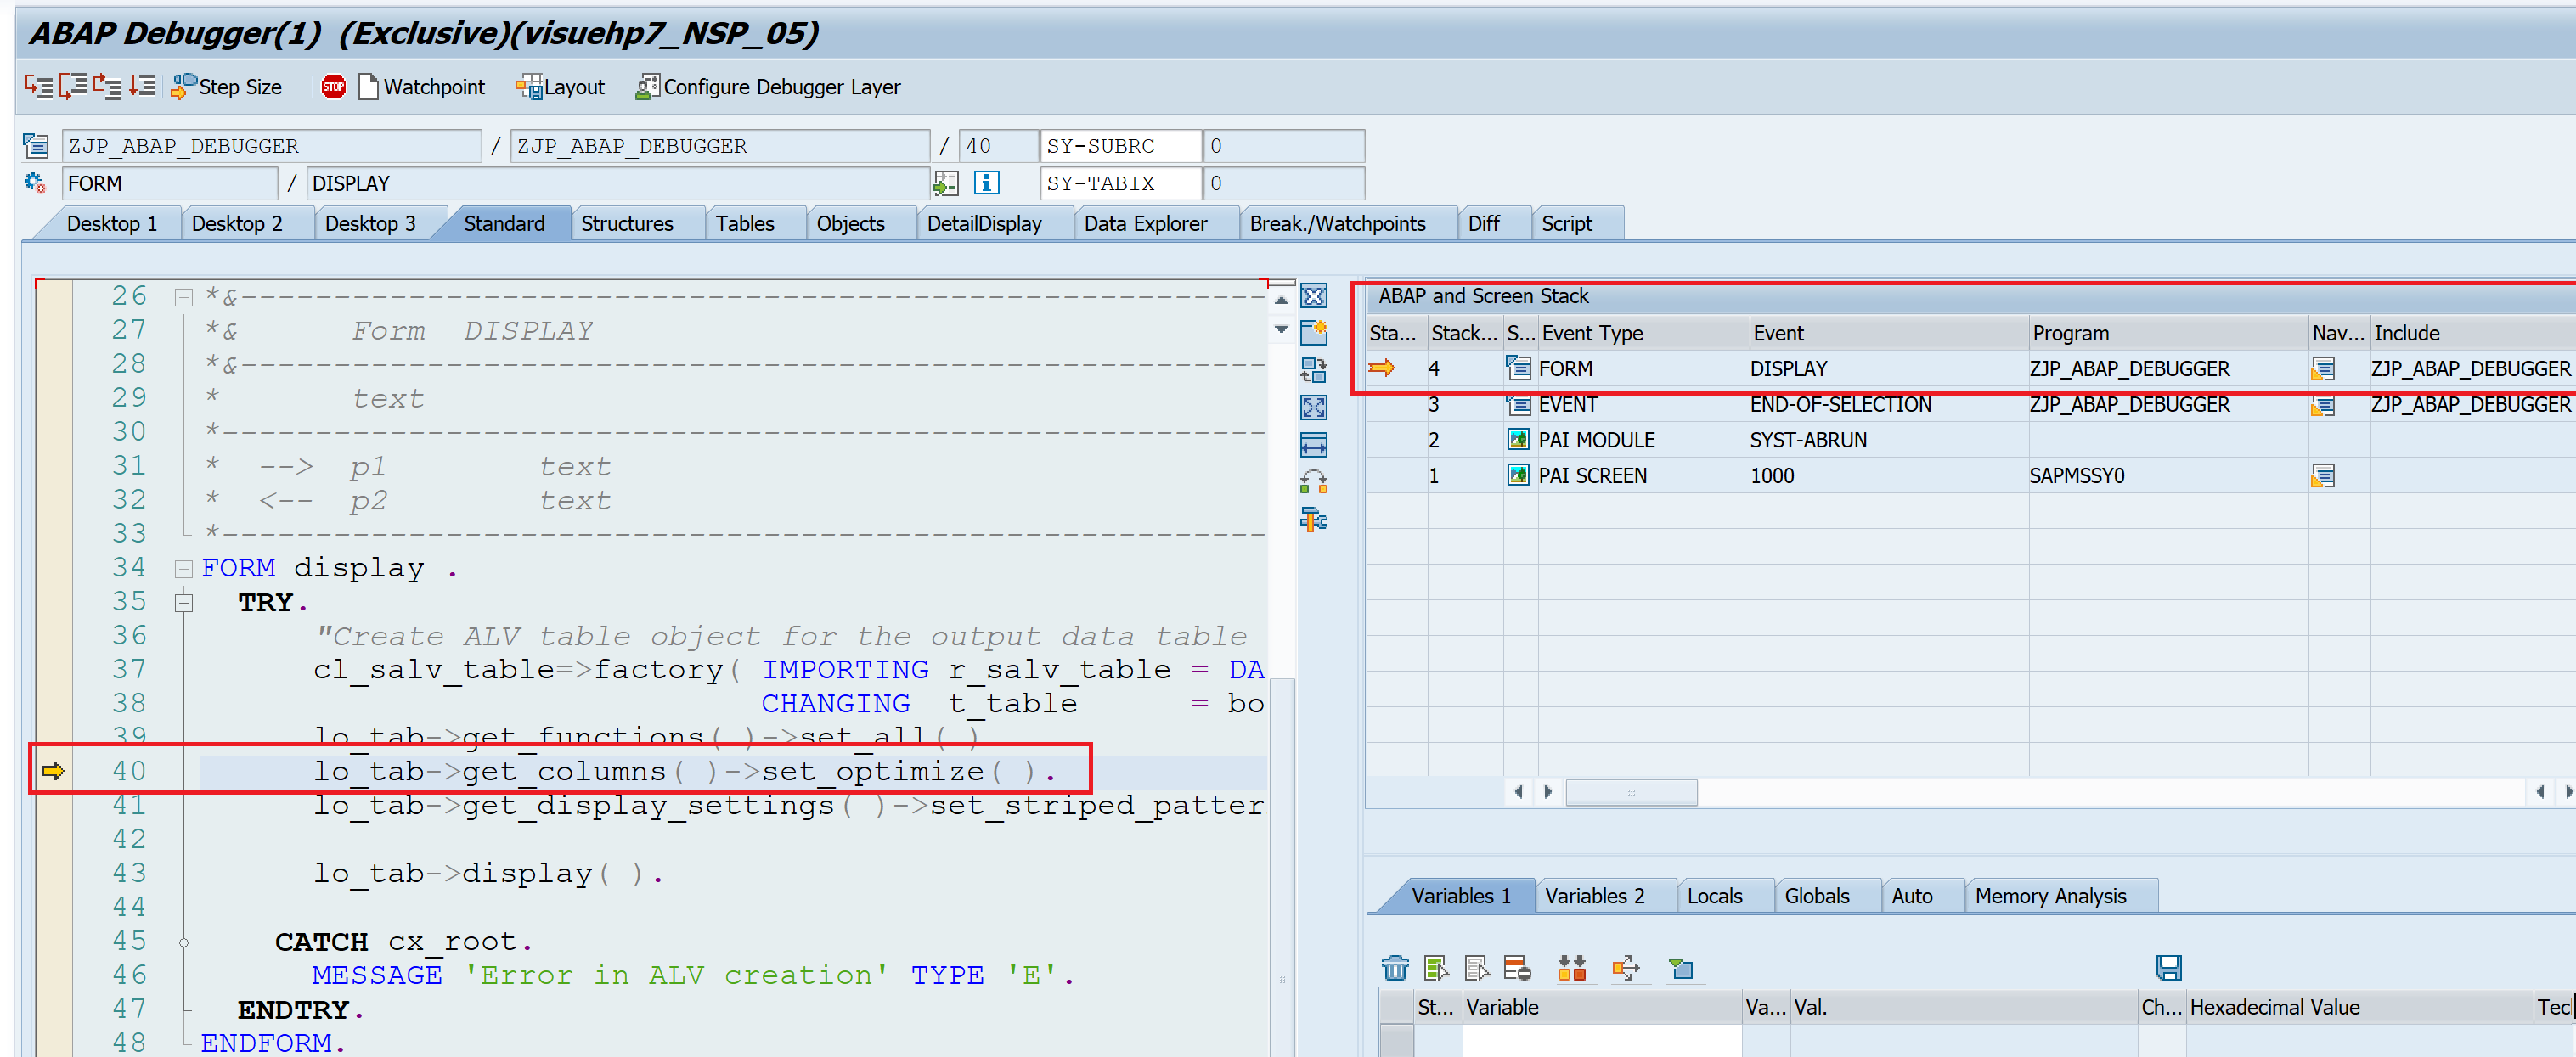
F6 / Execute
Executes all remaining statements within current modularization unit and goes to next statement in the calling unit.
After F6
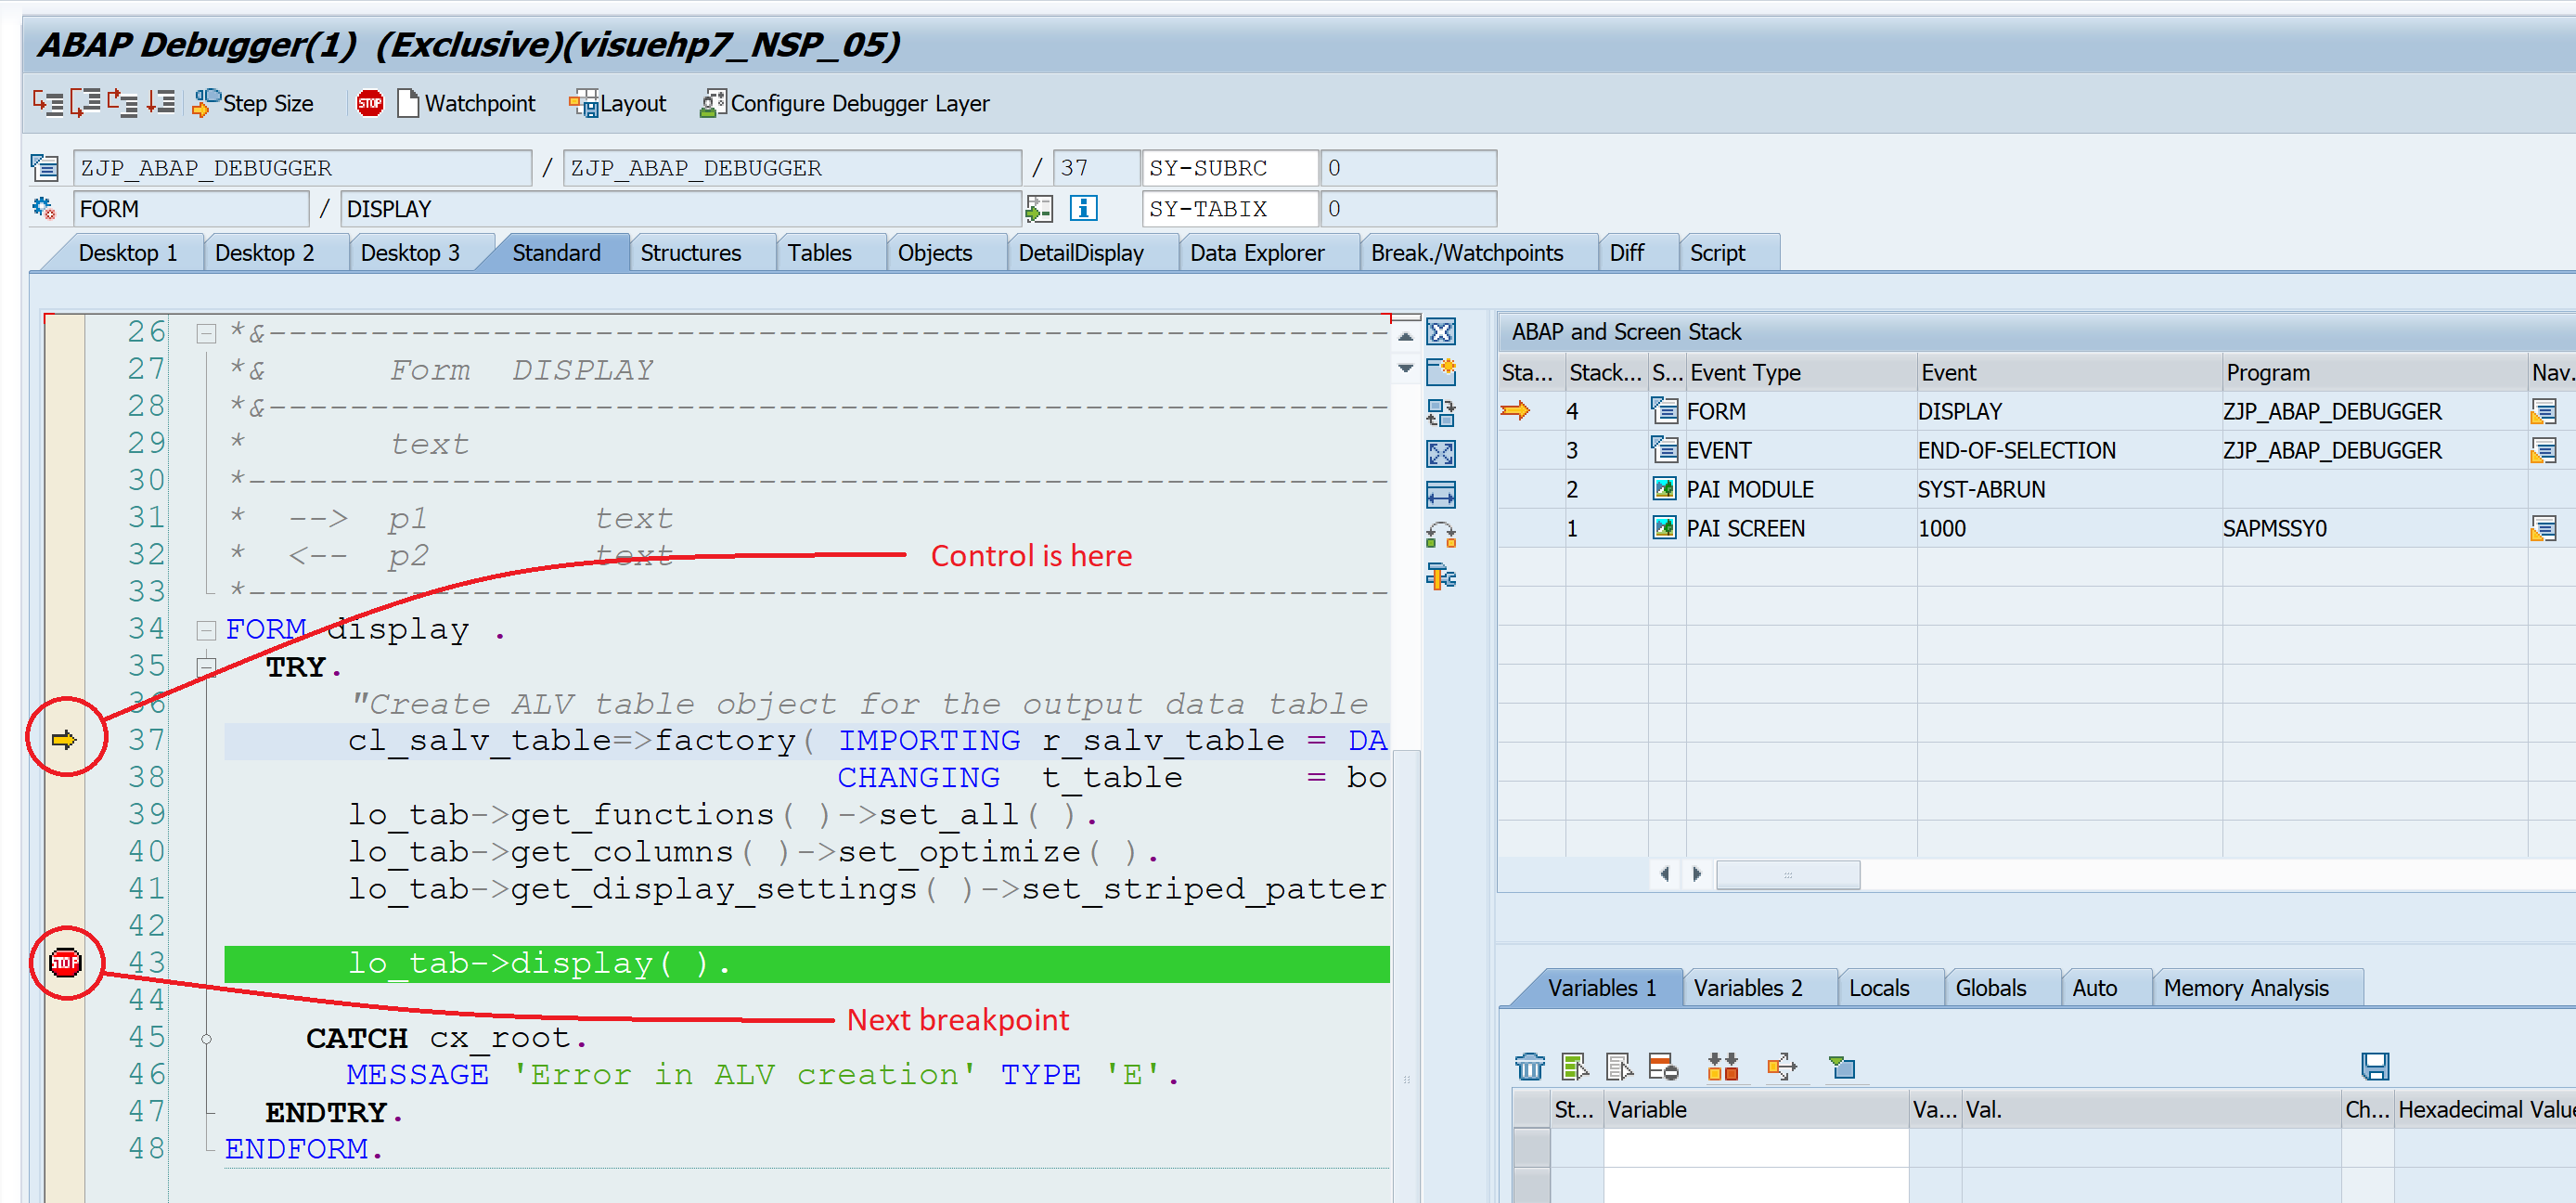
F7 / Return
Use this to come out of a subroutine or, method or, function module.

After F7
Rest of the method code is executed and the control goes back to the caller.
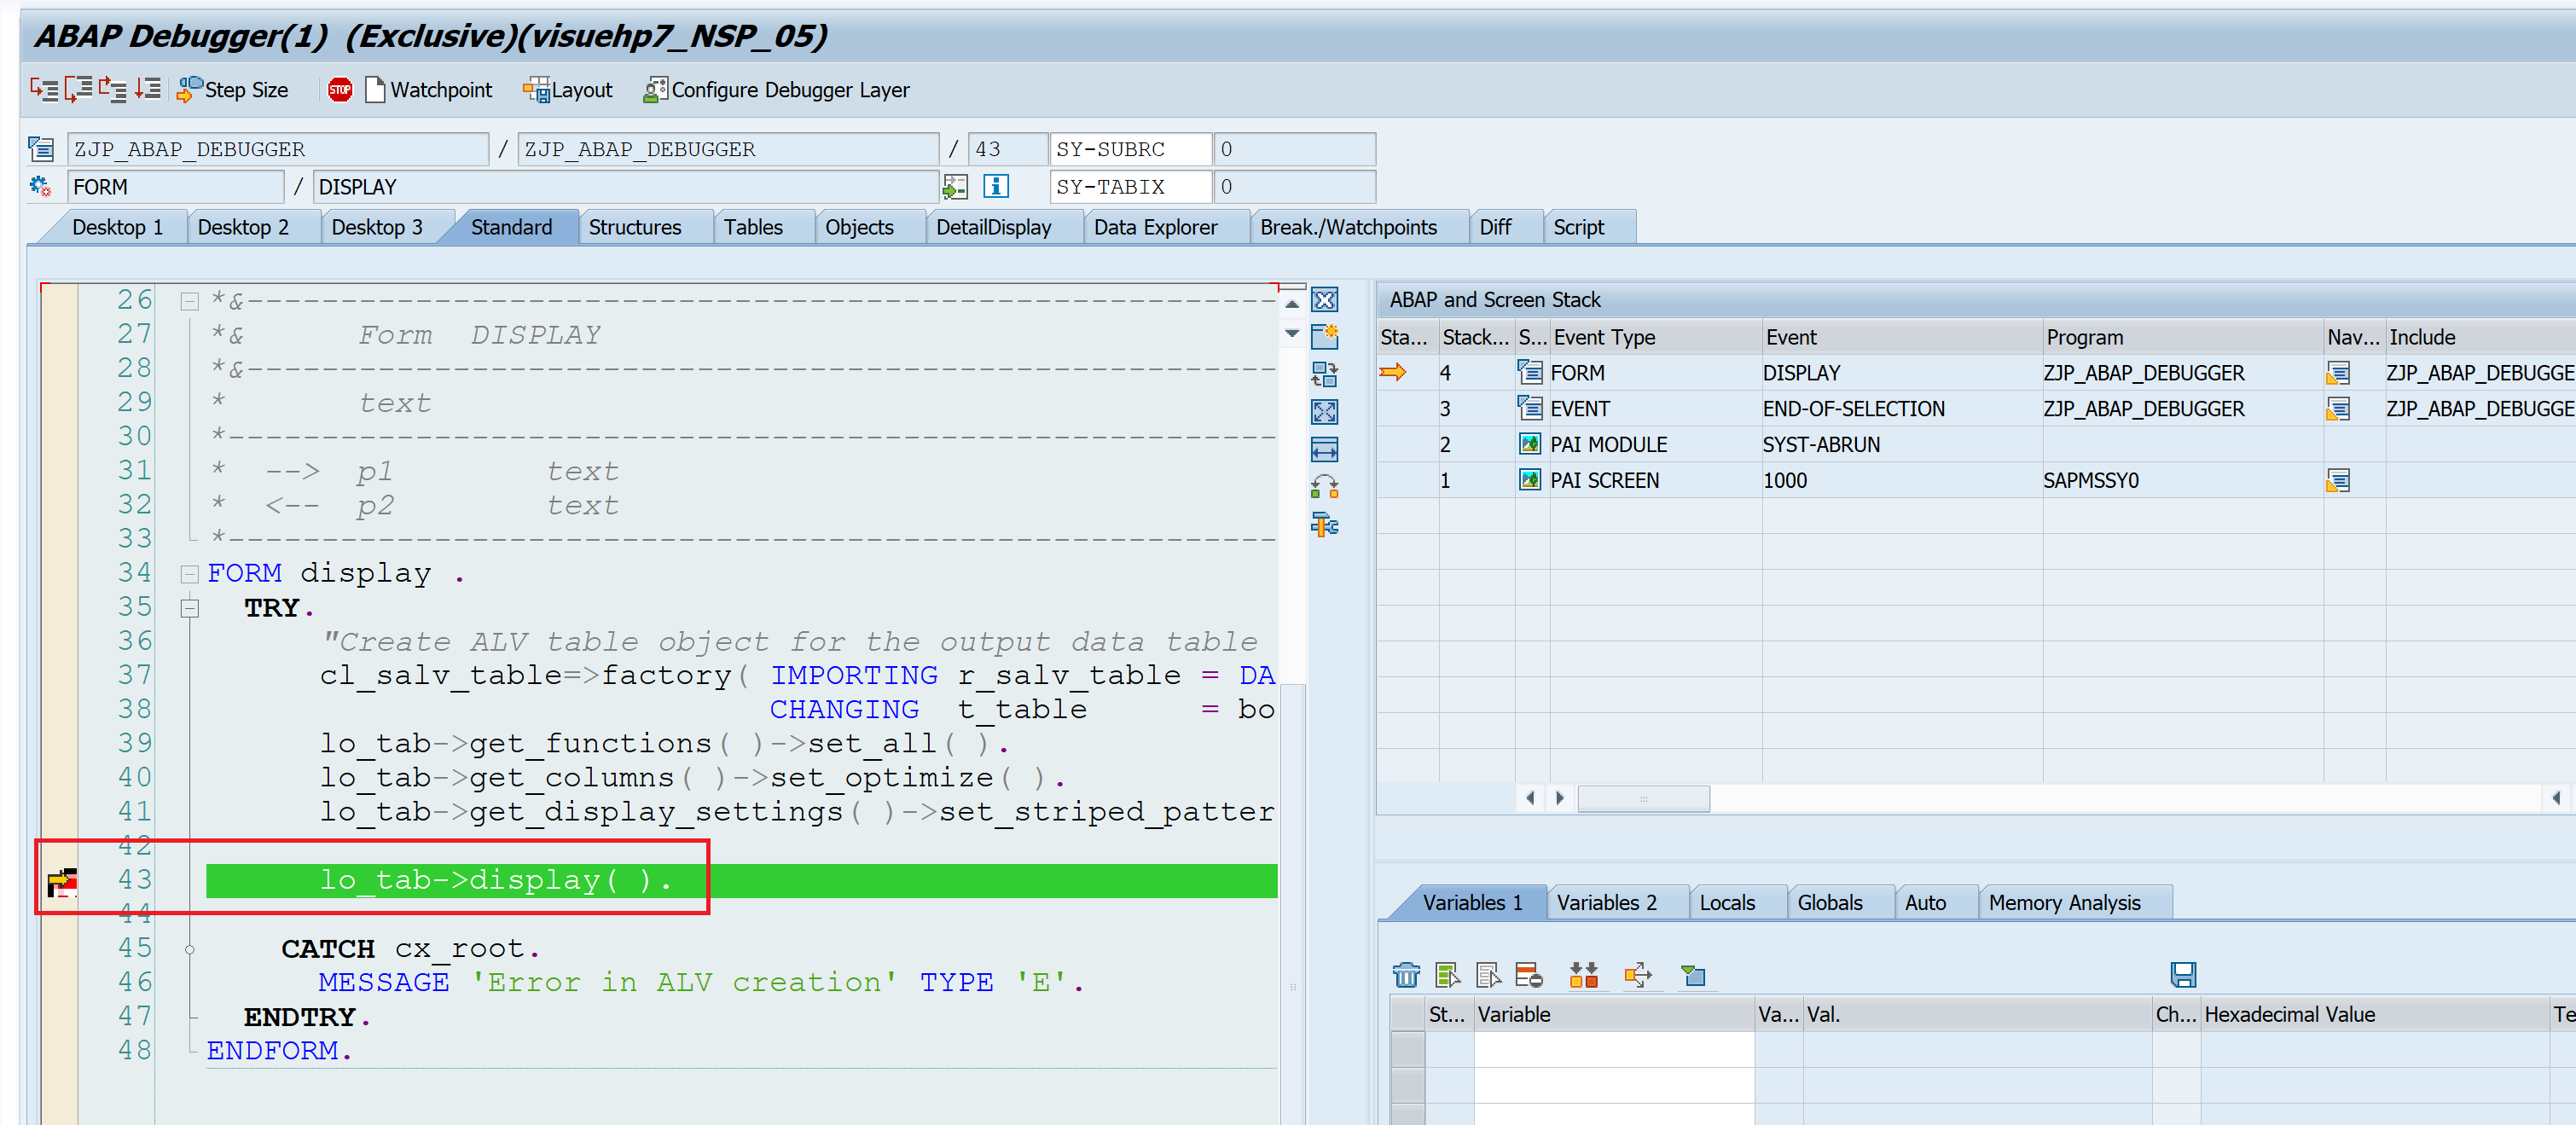
F8 / Continue
Executes till the next breakpoint. If there is no breakpoint till end of the execution, everything is executed. The next breakpoint can be a session breakpoint, external breakpoint or it can be a hard-coded breakpoint.
After F8
Shift + F8 or Continue to cursor
This is a less used but very useful option.
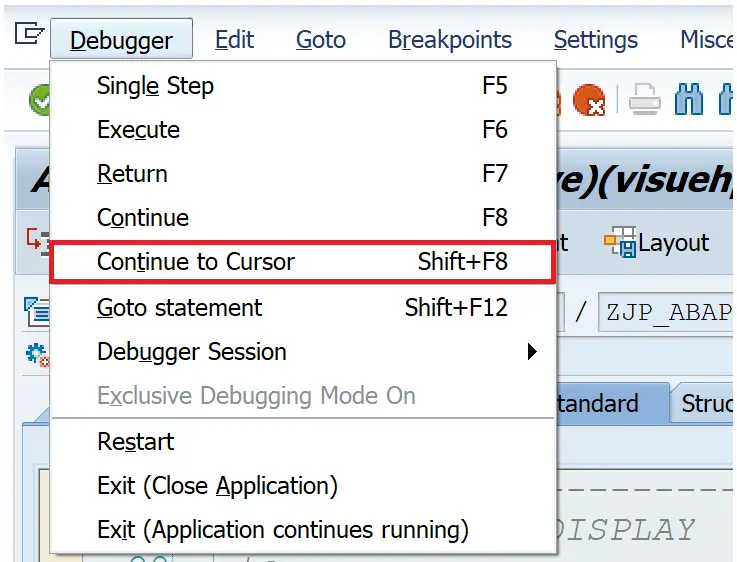
This can be used when you want to execute the code till certain statement. Just place the cursor on the statement to reach and press Shift + F8 this executes the statements up to the statement where cursor is placed without having to set a break-point.
Copy the program, and practice using F5, F6, F7 and F8. The next post will talk about other menu options used in the debug mode.
Visit ABAP Debugger page to see more articles on debugging.
If you like the content, please subscribe…
