In this post, you will learn how to Install Eclipse and ABAP Development Tools (ADT) in Eclipse. The Eclipse version is updated every 6 months – so you may see slight differences, but the post should still help you install eclipse.
Process to install Eclipse
1. Go to Eclipse URL https://www.eclipse.org. Click on the Download button.

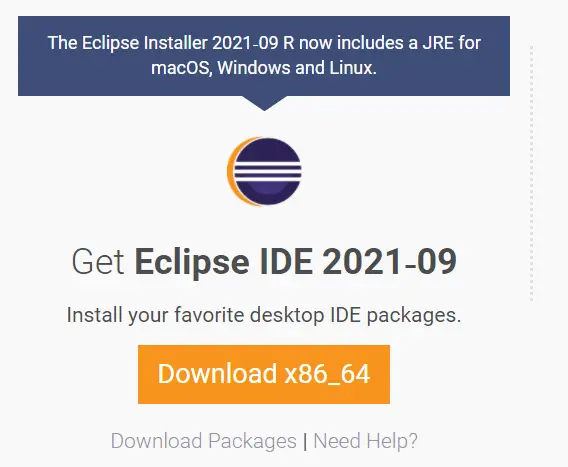
2. Use Download for Windows x86_64 to download Eclipse for Windows 64 bit version.
Note: Click on ‘Download Packages’ or visit link https://www.eclipse.org/downloads/packages/ if you are using any other OS.
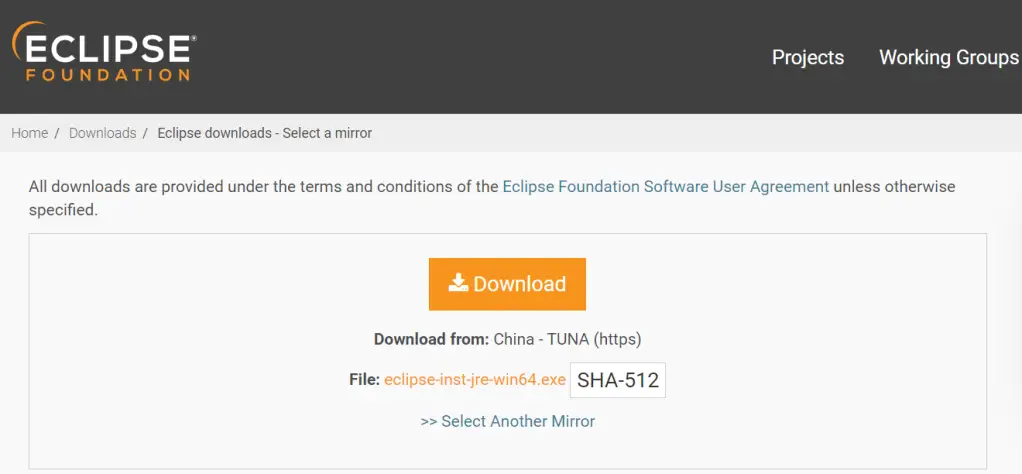
3. Again, click on the Download. The package will get downloaded to your Download folder.
4. Locate the downloaded file and double click on the file to start installation.

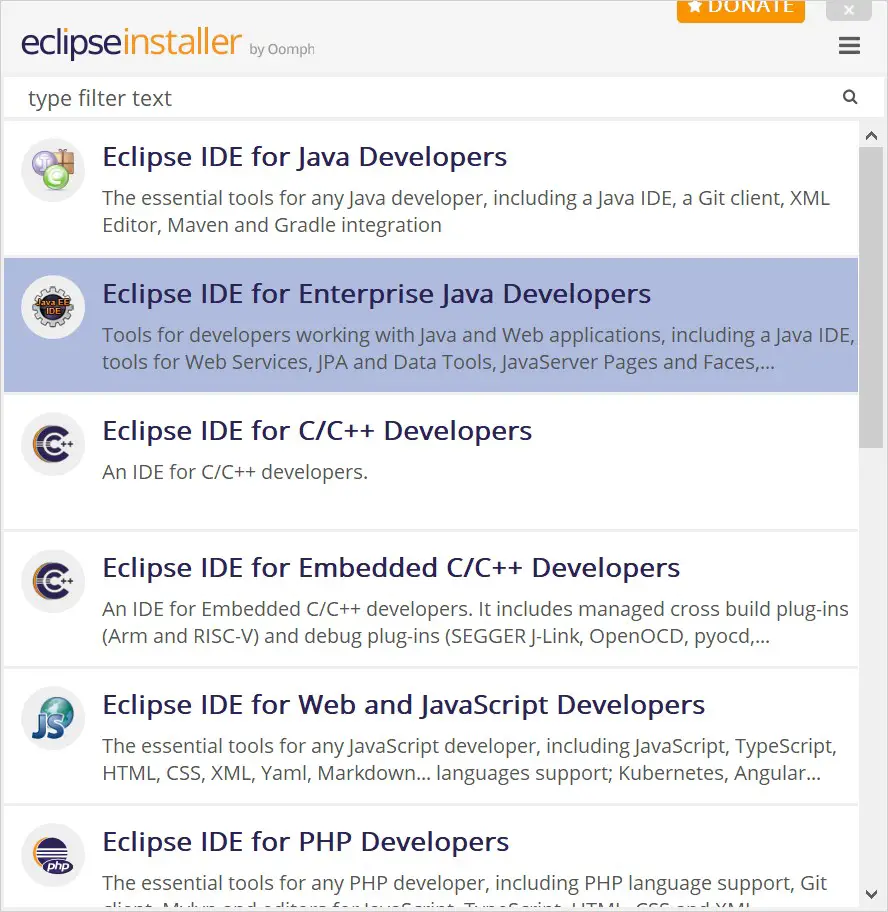
5. Eclipse Installer is launched.

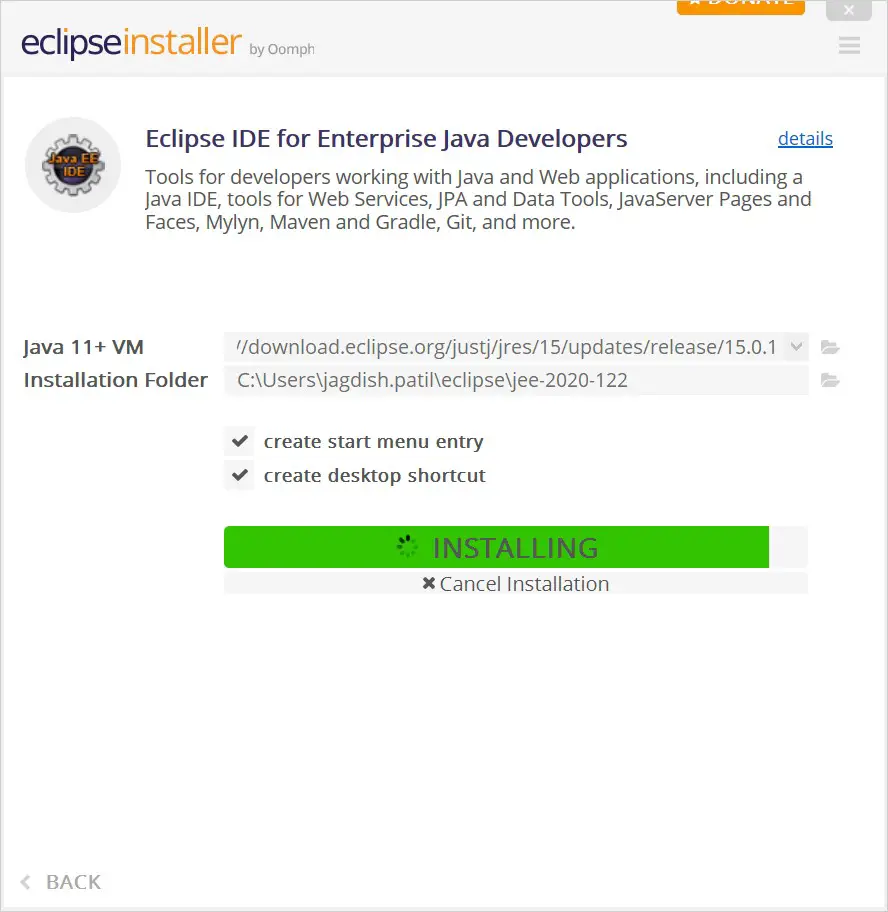
6. Here, select Eclipse IDE for Enterprise Java Developers. (Yes, even if you are an ABAPer)
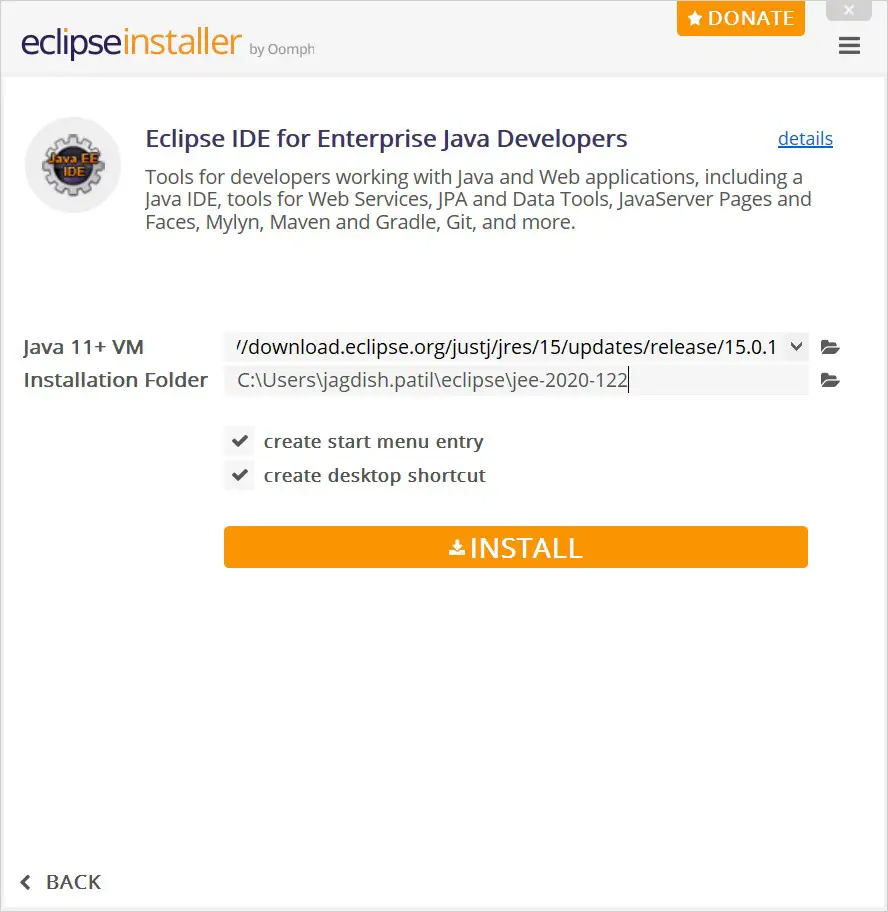
7. Click Install.
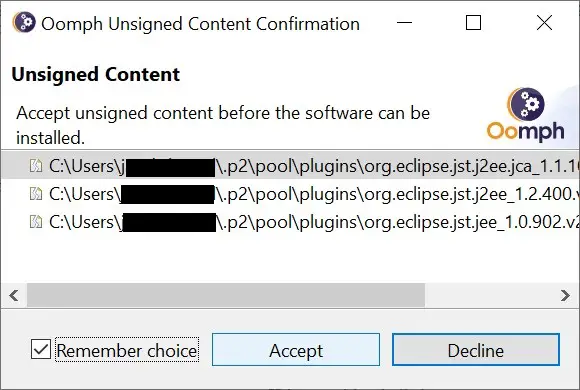
8. If you may get a pop-up to confirm the unsigned content, click Accept.
9. Installation will start. Wait for it to complete.
10. Once installation is completed, launch eclipse from desktop icon or from programs.

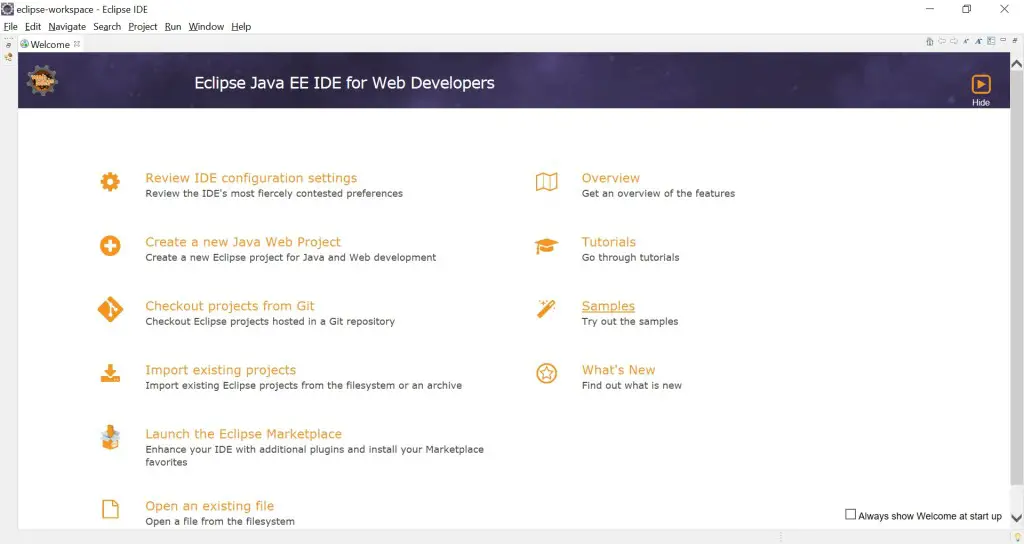
Depending on your Eclipse version the look and feel and the version text (2021-06) will change.
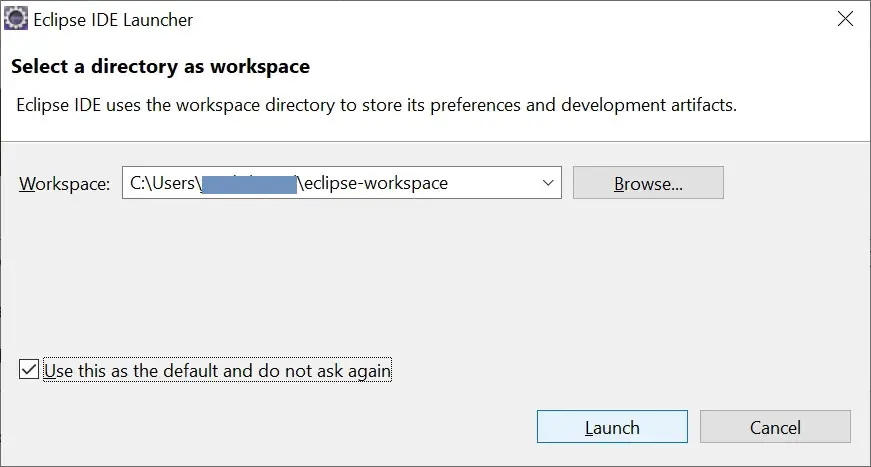
11. When you are starting the Eclipse for the first time, you will be asked to select a directory for Workspace. Once you select it, click Launch.
12. Eclipse will start.
Now that Eclipse is installed, we can install ADT i.e. ABAP Development Tools and get ready to do ABAP Development in Eclipse.
How to install ABAP Development tools
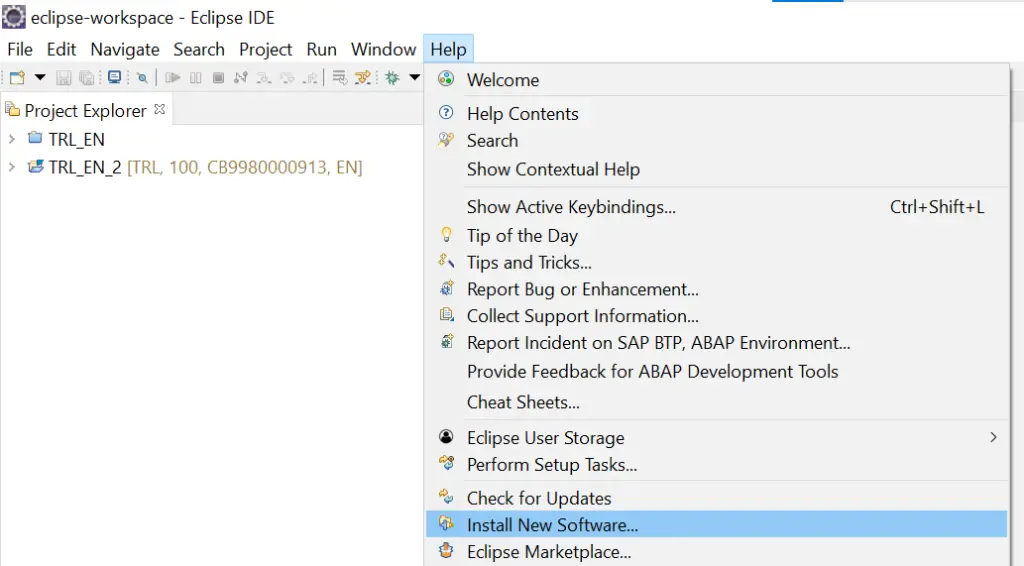
1. Start Eclipse. Go to Menu option Help –> Install New Software
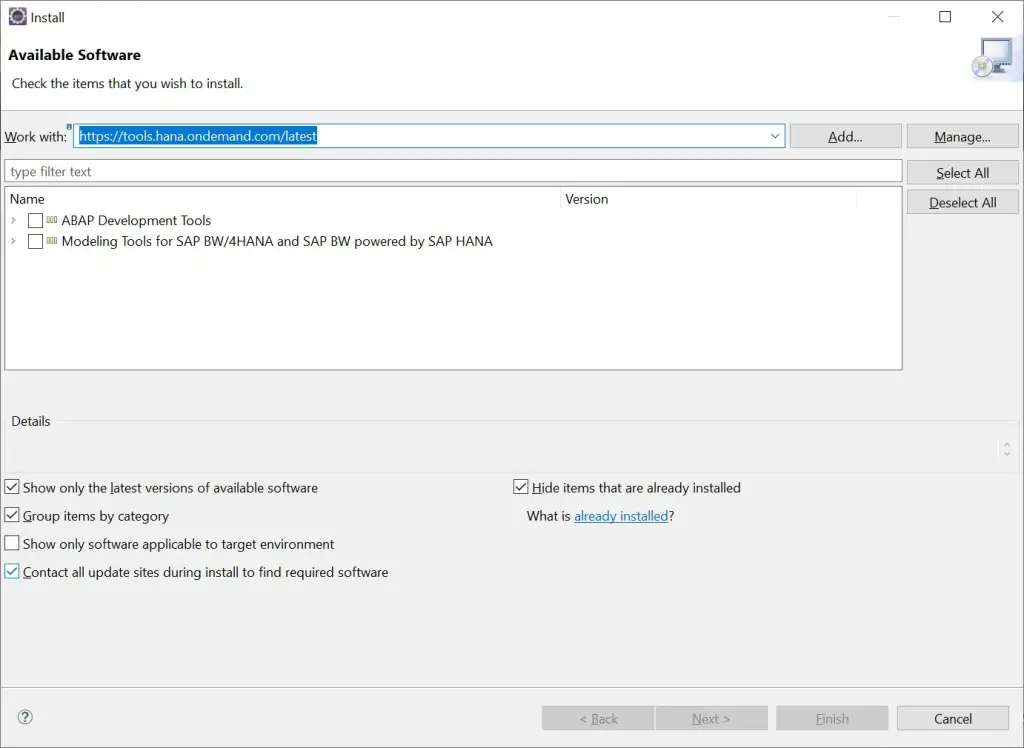
2. Enter URL https://tools.hana.ondemand.com/latest in the field Work with and click on Add.
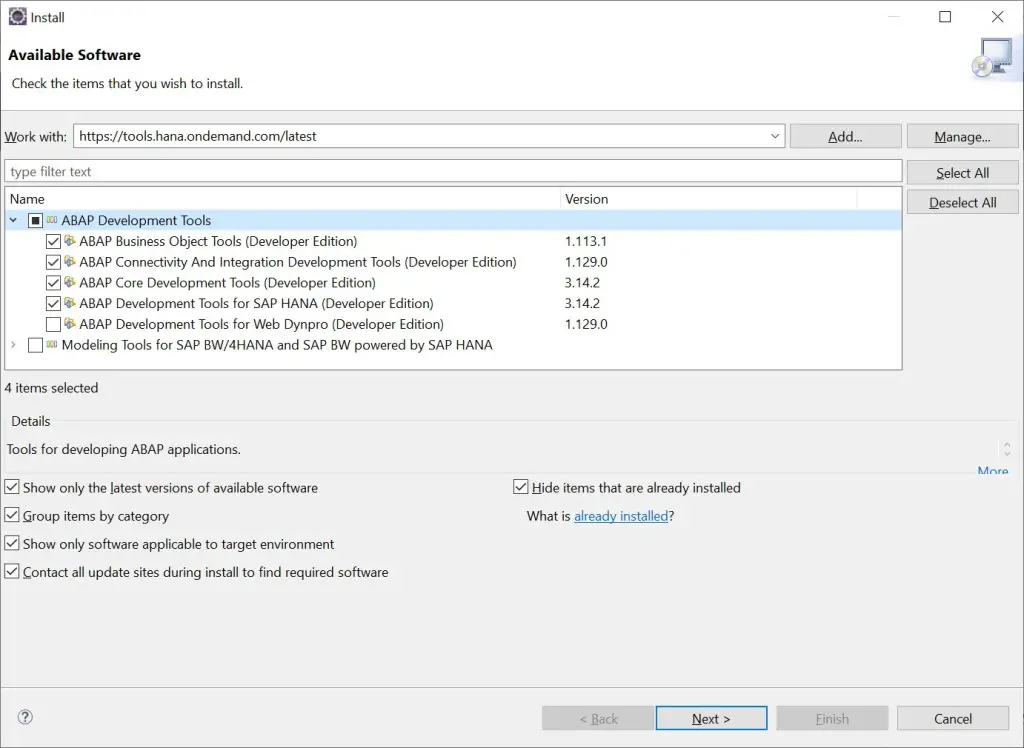
3. Expand ‘ABAP Development Tools’ node and select the tools you want to install. Click Next. ( Note: For BW on HANA select the relevant node. )
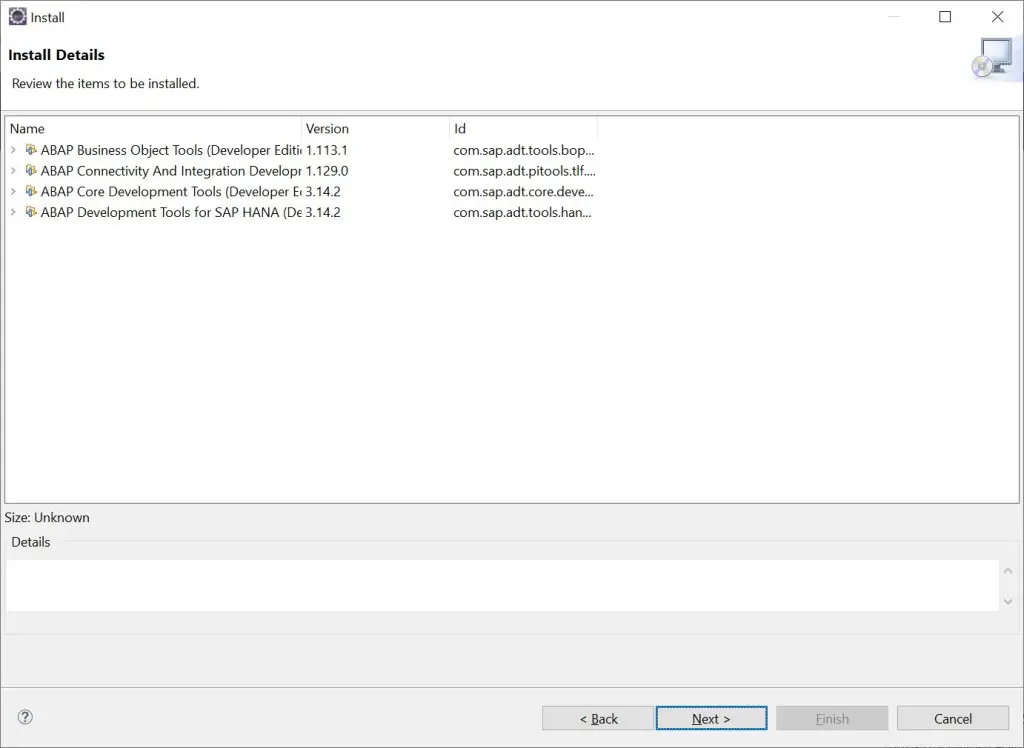
4. Click Next on next screen as well.
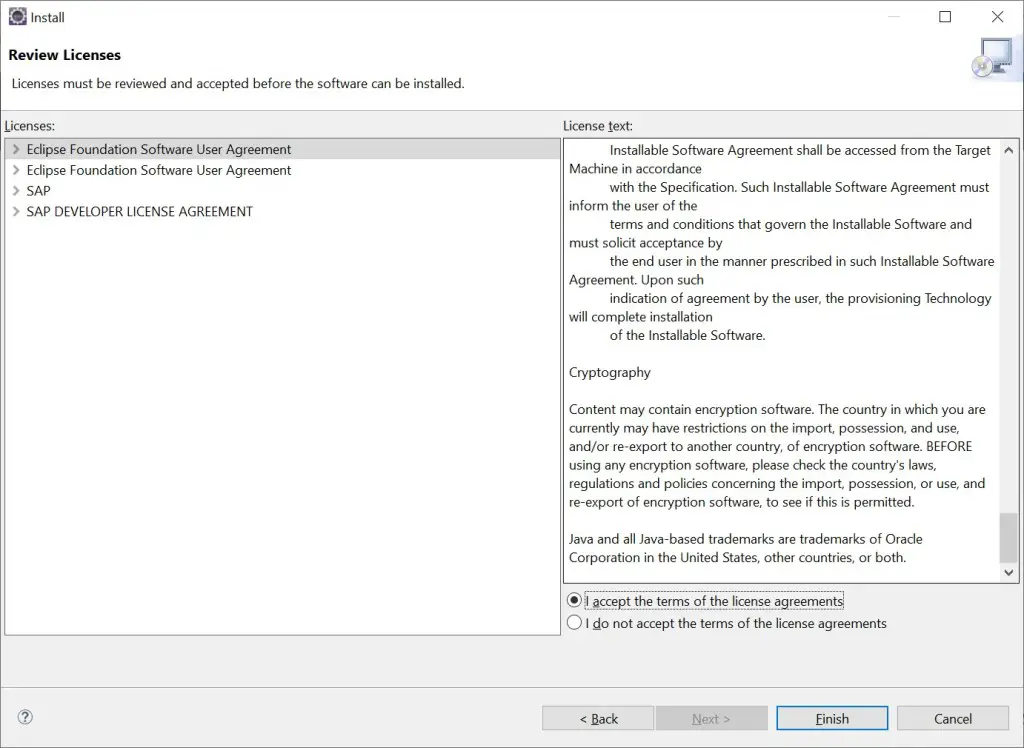
5. Read and accept the terms and license agreement. In case you are wondering why the radio-button in grayed out is because you have not scrolled through the content. So scroll though to the end, read and accept terms and license agreement.
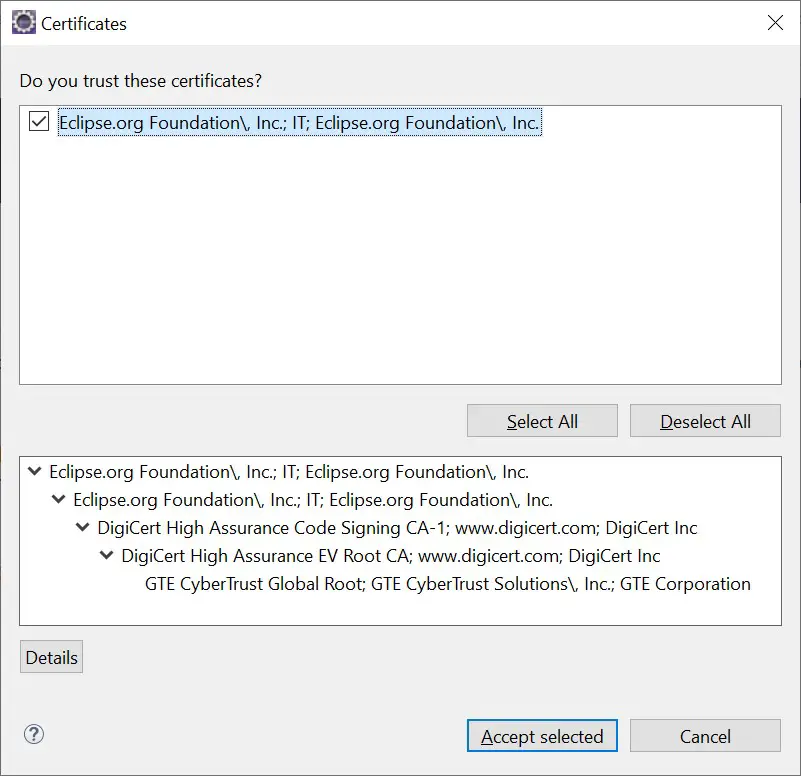
6. Eclipse may ask you to accept the certificates as well.
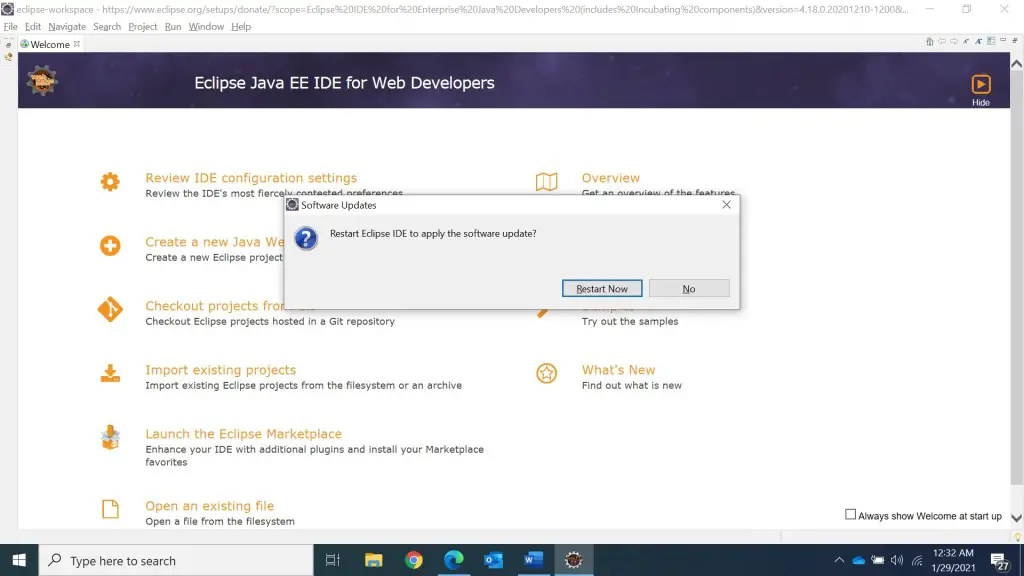
7. Restart Now.
8. Once Eclipse is restarted, the overview screen appears, it shows ABAP Development details.
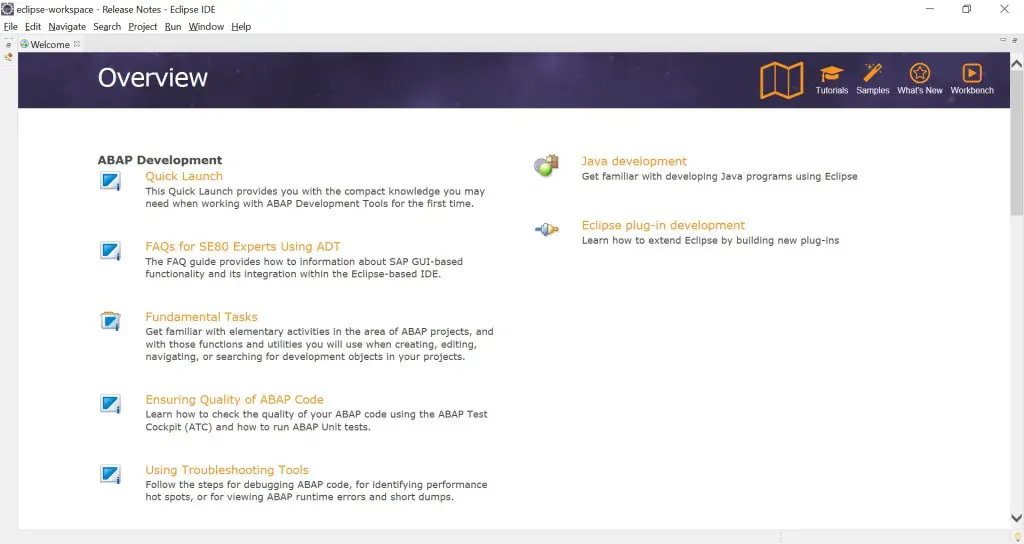
This means you have installed ADT successfully.
In next post, we will see how to create ABAP Instance in HANA Trial account and add the system in Eclipse.
If you like the content, please subscribe…
